This topic covers processes requiring access to your Network Dynamics Client Area. If you’re unsure how to access the Client Area, please follow this guide before continuing – How do I Login to my Network Dynamics Client Area?
Dedicated / NetPanel Servers #
This guide explains how to view important information about your dedicated server, including the login details stored securely within your Network Dynamics Client Area. We’ll also cover how to use the login credentials to login to the web-based GUI (Graphical User Interface) so that you can easily manage your service.
Locating the server details and credentials #
1. First, login to your Network Dynamics Client Area
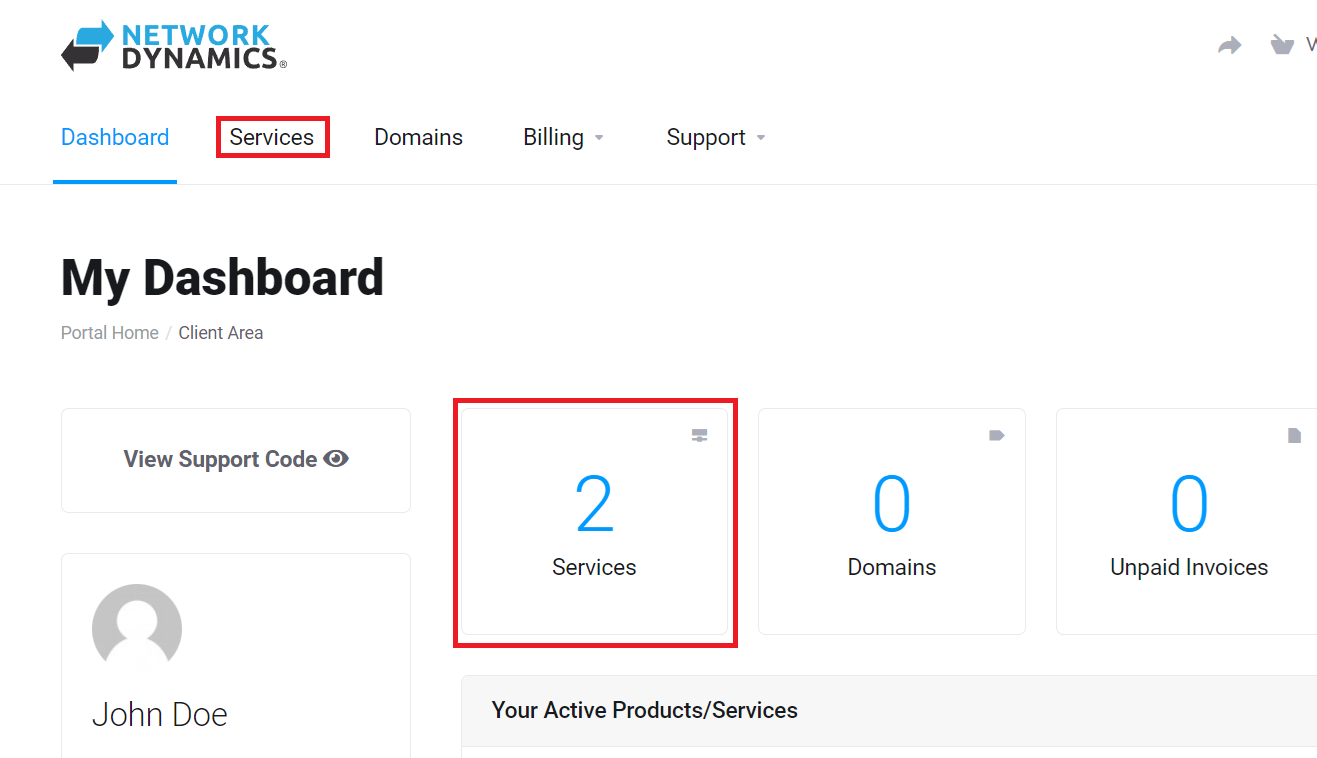
2. Click ‘Services‘ in the menu at the top or from the Dashboard page.

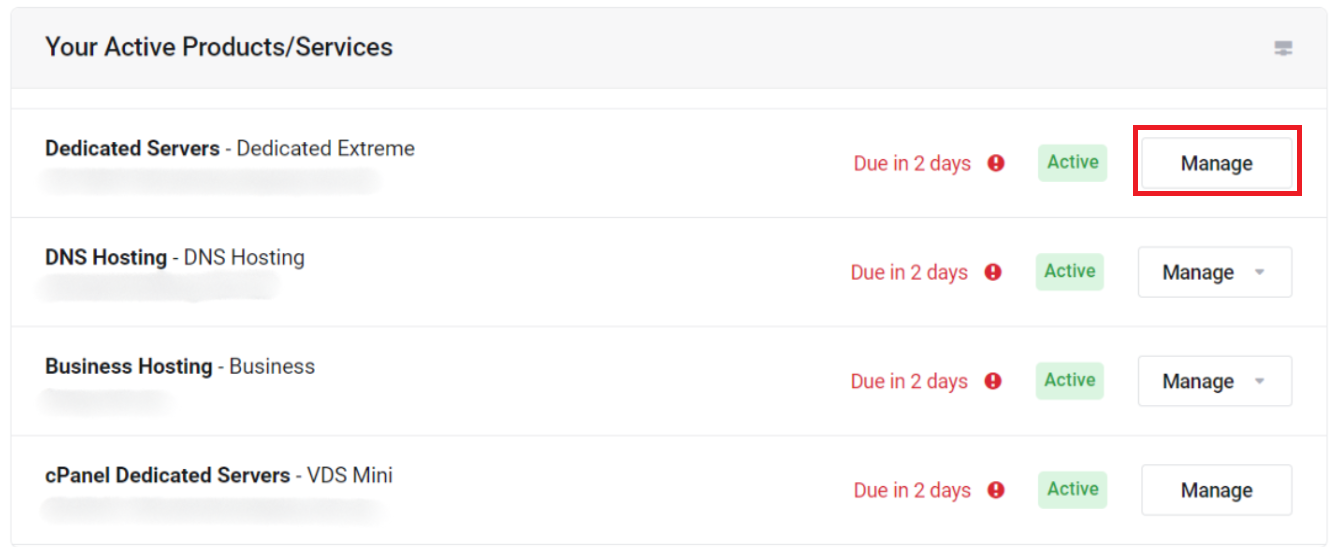
3. Find the dedicated server you want and click the ‘Manage‘ button

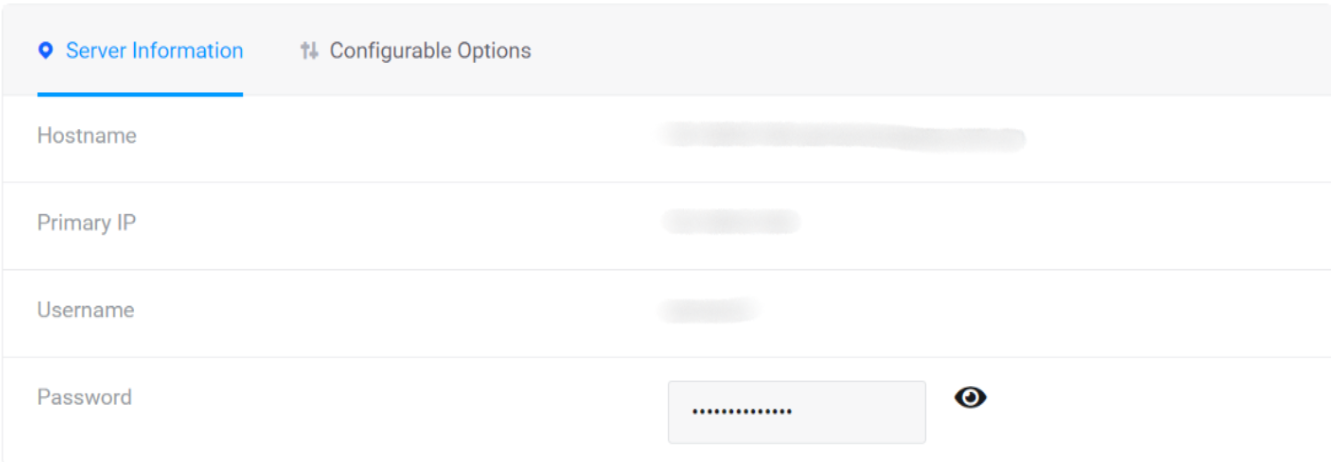
4. Next, scroll down to see the “Server Information” section. This area will show important information for your dedicated server including the username & password.
Take note of the Hostname, Username and Password shown here.
Please Note: The password will be hidden, by default. Click the “eye” icon to reveal the actual password.

Logging into NetPanel/dedicated servers #
To access a server, visit the login URL and enter you login details.
IMPORTANT: The login URL uses the format “hostname:8443” as shown in the example below. Please also note that this port number is specifically for non-WHM based servers.
- 45-65-61-000.servercompany.com.au:8443
Be sure to replace the example “45-65-61-000” with your actual hostname from Step 4.
A note for WHM users: If your dedicated server is configured with WHM, you can use the steps in this guide to login and manage the cPanel account(s) and other related server settings.
Conclusion #
By following these steps, you’ll confidently manage your dedicated servers within the Network Dynamics Client Area. Moreover, as you explore its features, you’ll streamline operations and maintain optimal performance. In turn, embracing these tools enables you to take full command of your dedicated servers and further enhance your management experience.
