
At Network Dynamics, we understand that reliable network performance starts with the right DNS settings. In this guide, we’ll explain what a DNS resolver is, why you might want to update it, and exactly how to do it on both Windows and Mac systems.
What is a DNS resolver?
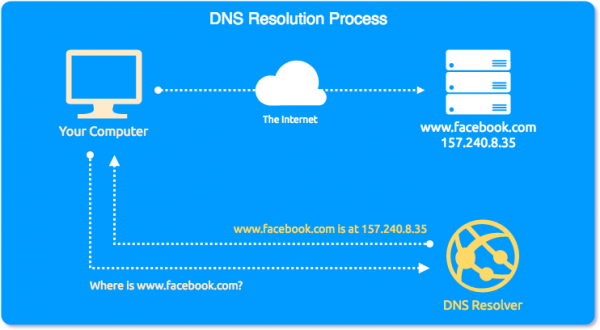
A DNS resolver is what your device uses to find services on the internet without needing you to memorise long IP addresses. For example, typing facebook.com is clearly easier than trying to remember 157.240.8.35. DNS resolvers handle this translation from a domain name to an IP address in the background, so everything loads as expected.
Whenever your computer needs to reach a website, it first sends a request to a DNS resolver. That resolver then finds the correct IP address linked to the domain name and sends it back to your system. This process is known as DNS resolution.
What is an IP address?
An IP address is a numerical label assigned to every device on a network. Without it, your device wouldn’t be able to communicate with any other machine, whether locally or over the internet. It’s like a phone number for your device — without one, there’s no way to connect.
Why would you want to update your DNS resolver?
While DNS resolvers make things simpler, the results they return are cached locally to speed up future access. This cache stays active for a set amount of time, known as TTL (Time to Live). However, issues can occur when those cached records become outdated.
For example, if you’ve recently migrated a website or you’re in a corporate network where DNS traffic is directed in a specific way, your device might still use the old IP address. To fix that, updating your DNS resolver can bypass outdated records and help you see the most current version of a website instantly.
How to update your DNS resolver
For macOS
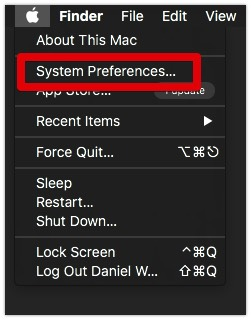
1. Go to ‘System Preferences‘.
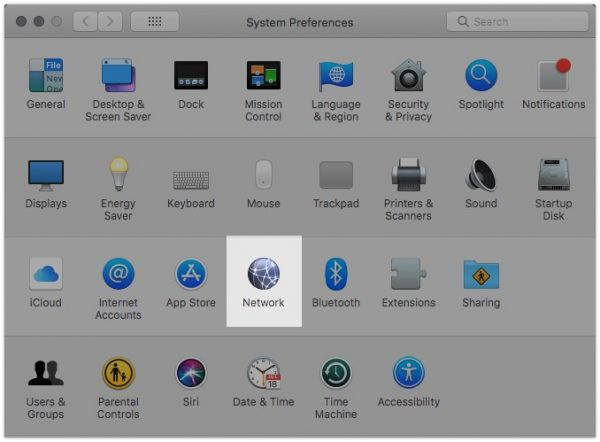
2. Click ‘Network‘.
3. Select your active network connection and click ‘Advanced‘.
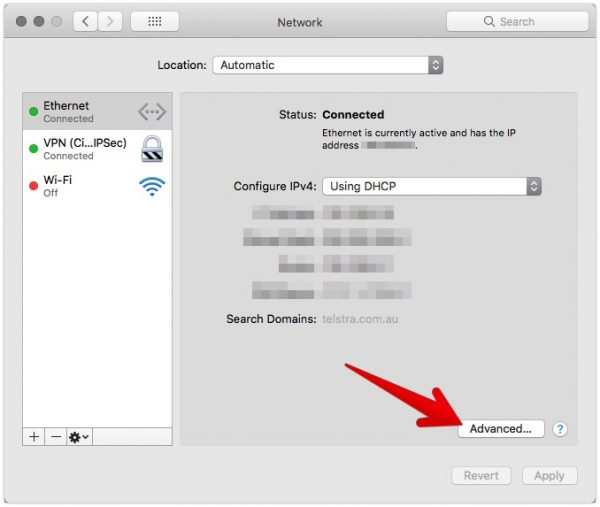
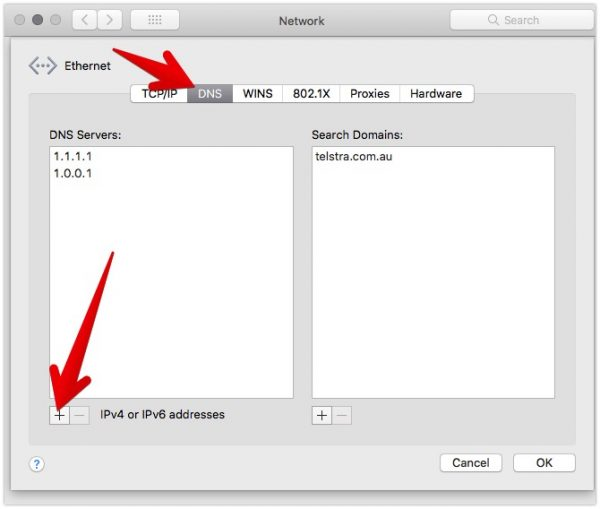
4. Click the ‘DNS‘ tab, then use the ‘+’ button to add a new DNS server, enter DNS (e.g. 1.1.1.1, 8.8.8.8), then click ‘OK‘ when done.
For Windows
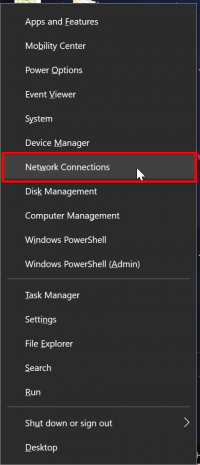
1. Right-click the ‘Start‘ menu and select ‘Network Connections‘.
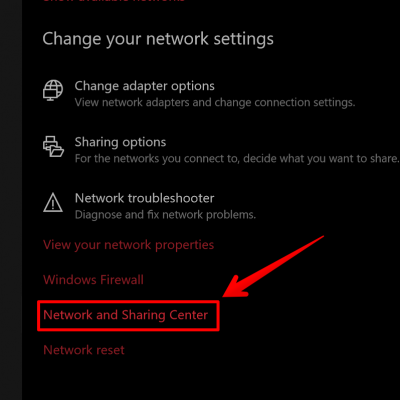
2. Click ‘Network and Sharing Center‘.
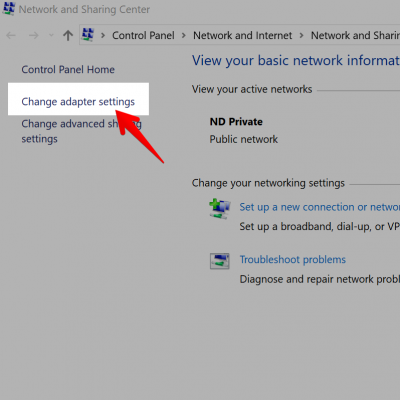
3. Choose ‘Change adapter settings‘ from the sidebar.
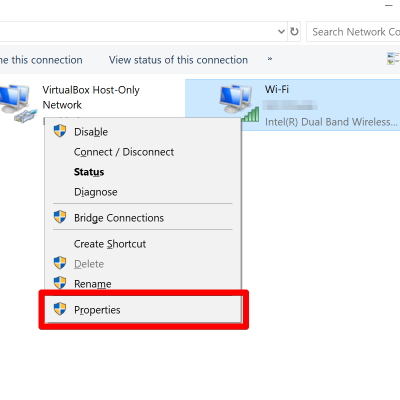
4. Right-click your active connection (usually Wi-Fi) and select ‘Properties‘.

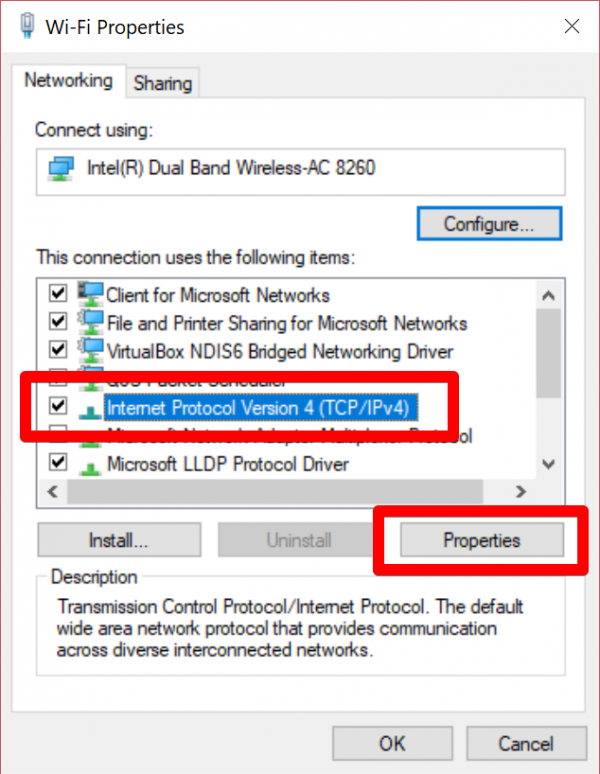
5. Click on ‘Internet Protocol Version 4 (TCP/IPv4)‘, then click ‘Properties‘.
6. Select ‘Use the following DNS server addresses‘.
7. Enter your preferred resolvers (e.g. 1.1.1.1 and 1.0.0.1).
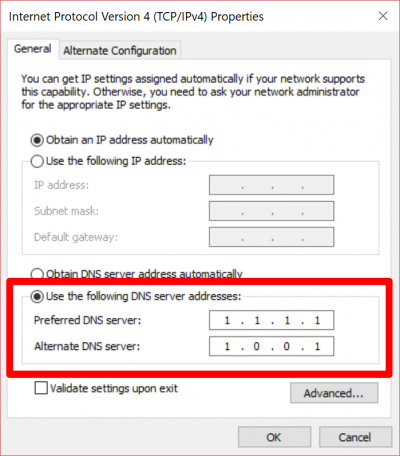
8. Save the changes by clicking ‘OK‘.
Conclusion
Although it’s often overlooked, updating your DNS resolver can make a big difference to your internet speed and reliability. Not only does it help resolve browsing issues, but it also ensures that you’re always accessing the latest DNS records — which is especially useful after website migrations or DNS changes.
At Network Dynamics, we’re here to help you take control of your DNS settings and maintain a secure, stable, and high-performing network. If you need help with this process or have other network-related concerns, feel free to get in touch with our expert team.