At Network Dynamics, we understand the importance of managing your billing information to maintain uninterrupted service. In this guide, we explain how to change the default billing method using our user-friendly Client Area.
This topic covers processes requiring access to your Network Dynamics Client Area. If you’re not sure how to access the Client Area, please follow this guide before continuing – How do I Login to my Network Dynamics Client Area?
First, we cover the necessary steps to access your billing settings quickly. Then, we detail how you can update your payment details to reflect your preferred method. Additionally, we offer practical tips to ensure your billing information remains accurate and secure, thereby preventing service disruptions.
Consequently, you can streamline your account management with minimal hassle and enjoy enhanced control over your financial transactions. Ultimately, our comprehensive guide empowers you to change the default billing method confidently and seamlessly.
Therefore, if you wish to optimize your payment process and maintain smooth operations, follow our step-by-step instructions to achieve a secure, updated billing setup.
1. Navigate to the Network Dynamics Client Area, and login to your account
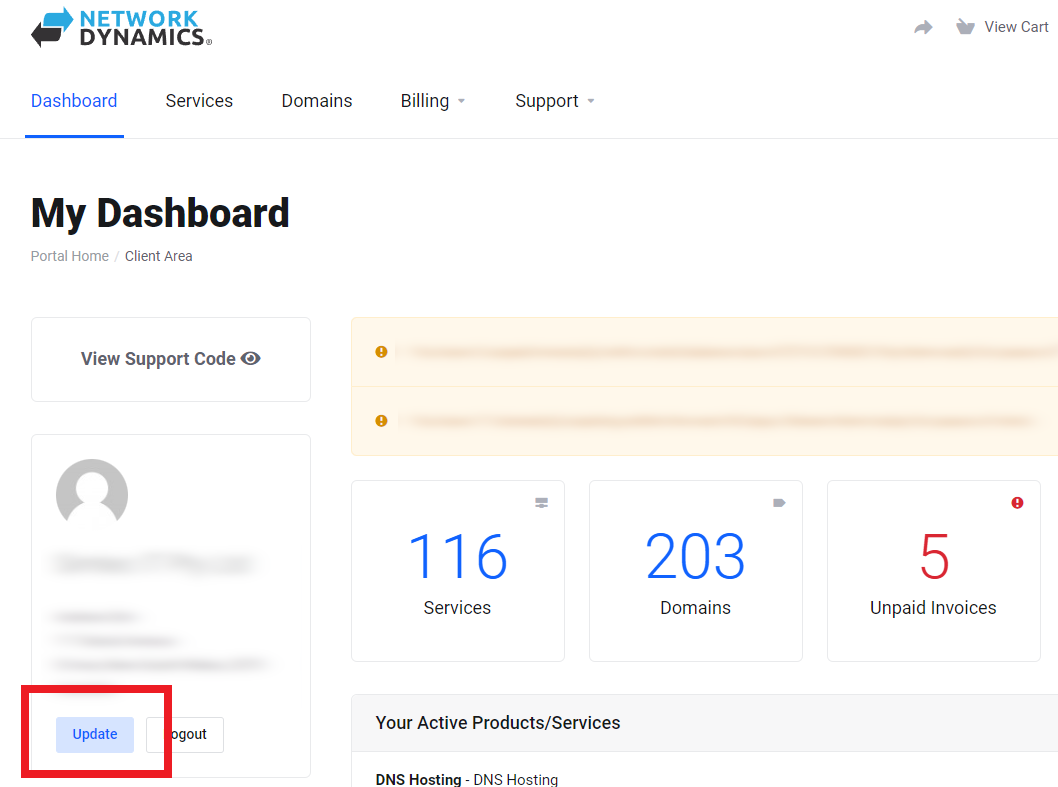
2. On the left side, under your profile information, click ‘Update‘.

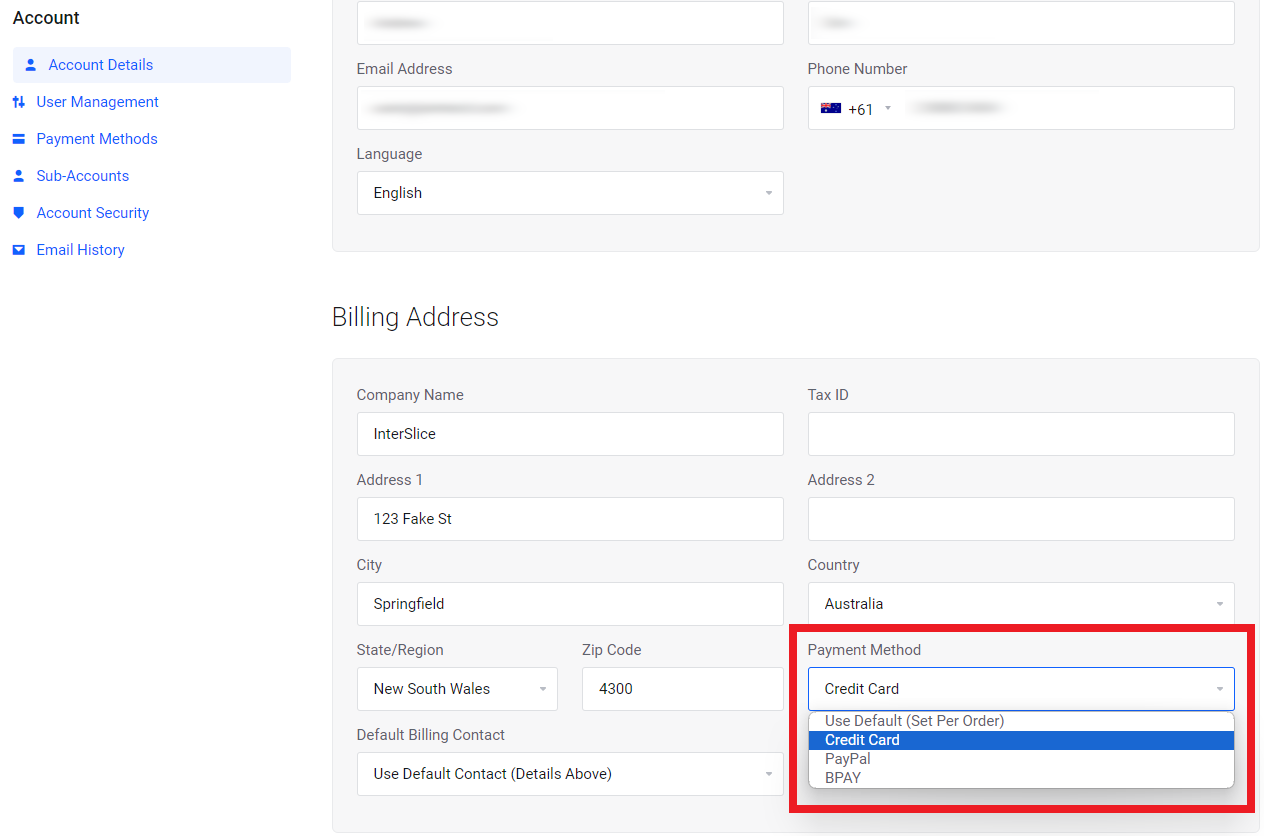
3. Scroll down this page to find the ‘Billing Address’ section. Choose your payment option from the ‘Payment Method‘ drop-down menu.
Note: By default, this is set to “Per Order” (this means that each product will use the billing method chosen during the checkout process at the time of purchase).

4. Scroll to the bottom of the page and click ‘Save Changes‘
PLEASE NOTE: We do not support bank transfers or ‘EFT’.
- Our accepted forms of payment include Credit Card, PayPal and BPay.
