
Before you get started, it’s important to understand how addon domains work. If you’re planning to host multiple websites under a single hosting account, learning how to configure an addon domain in cPanel is a crucial first step.
Addon domains let you manage different websites, each with their own domain name and content, all under one cPanel account. This setup can save time and streamline website management—especially for small projects or sites with lower traffic.
What should I consider before hosting multiple websites?
Before adding more websites to your hosting account, it’s essential to understand how your hosting plan’s resources are shared. When you host multiple domains under one cPanel account, all websites draw from the same pool of server resources—such as disk space, CPU, and memory.
Although this generally works well for smaller or low-traffic websites, it may not be ideal for every scenario.
When does a separate hosting plan make more sense?
If your websites are large, complex, or attract high traffic, performance can quickly become an issue. For instance, one resource-hungry site might slow down all others on the account.
In such cases, we recommend hosting each website on its own plan. This can help improve performance, boost security, and allow more flexible scaling. If you’re unsure, Network Dynamics can help you assess the best option based on your website needs—simply reach out to our support team.
How many addon domains can I use?
At Network Dynamics, Business Hosting plans—except the Startup Plan—include unlimited addon domains.
So, if you plan to expand or anticipate increased traffic, you may want to choose—or upgrade to—a business hosting plans that better suits your long-term goals.
What exactly is an addon domain?
An addon domain is an additional domain name you connect to your existing hosting account. While it shares your account’s system resources, it functions as a completely separate website—with its own content, email accounts, and settings.
Before configuring an addon domain in cPanel, be sure to review the earlier considerations, especially if your sites are likely to grow.
Step-by-step: How to configure an addon domain in cPanel
To set up an addon domain in cPanel, just follow these steps:
1. Log in to cPanel
2. Navigate to the ‘Domains’ section.
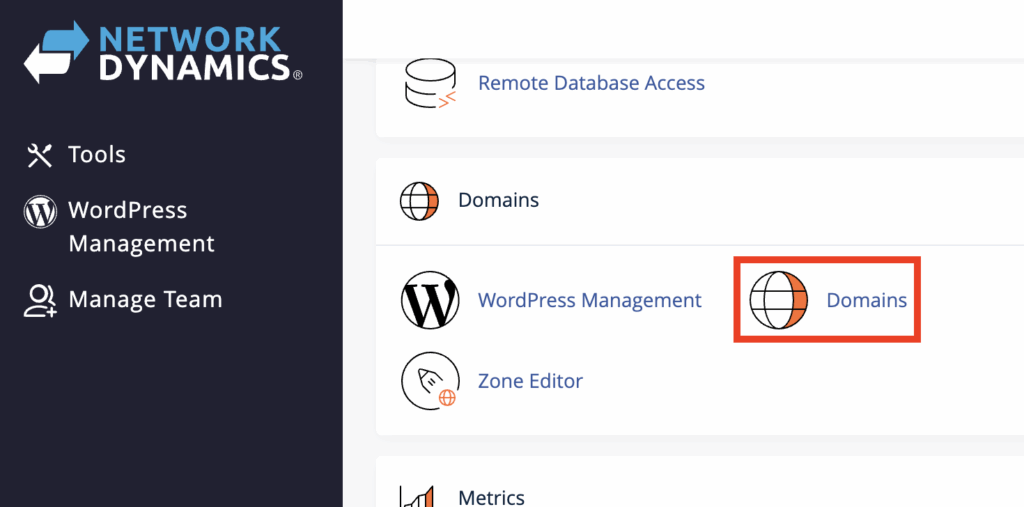
3. Click ‘Create A New Domain’.

4. Enter your new domain name in the ‘Domain’ field.
5. Leave ‘Share document root’ unchecked—this ensures the domain has its own directory.
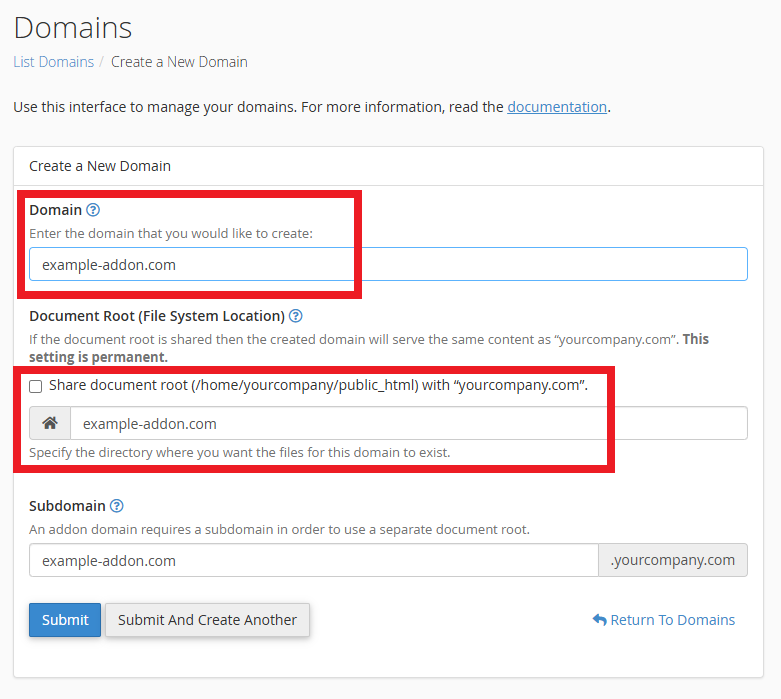
6. Click ‘Submit’ to create the addon domain.
7. You’ll be redirected back to the ‘Domains’ page, where you’ll now see your new domain listed.
By default, cPanel automatically configures the DNS records for your addon domain. However, you can manage or customise these records at any time.
How do I update DNS settings for an addon domain?
To customise your DNS settings:
- Open the Zone Editor in cPanel.
- From there, you can add or modify DNS records.
If you need help with this, our guide on Adding or modifying DNS records in cPanel covers everything step-by-step.
What if I use an external DNS service like Cloudflare?
For domains using external DNS services (such as Cloudflare), DNS records will not be added automatically. Instead, you’ll need to manually create the necessary DNS records through your DNS provider’s dashboard.
Need a hand?
If you have any questions or need assistance configuring your addon domain in cPanel, our support team at Network Dynamics is ready to assist you.