There are situations where you may prefer to use our WordPress subdomain hosting instead of hosting your entire website with us. For example, you might have an existing website at www.example.com but want to take advantage of our dedicated service to run a separate WordPress blog at blog.example.com. This approach allows you to maintain a clear distinction between your main site and your blog while benefiting from our expert hosting solutions.
Creating subdomains with another WordPress installation is only available for Business Hosting and above. You can find more details about each shared hosting plan when you visit this page: https://networkdynamics.com/website-hosting/wordpress-hosting/ or https://networkdynamics.com/website-hosting/business-hosting/. The Network Dynamics Startup Plan and the Business Startup Plan is only available for an Alias domain or a single WordPress installation.
To start created WordPress subdomain hosting: #
1. Sign up for a hosting account as normal, using your actual domain name (ie. yourdomain.com.au).
2. Once the account has been setup and you’ve received the welcome email, log into cPanel.
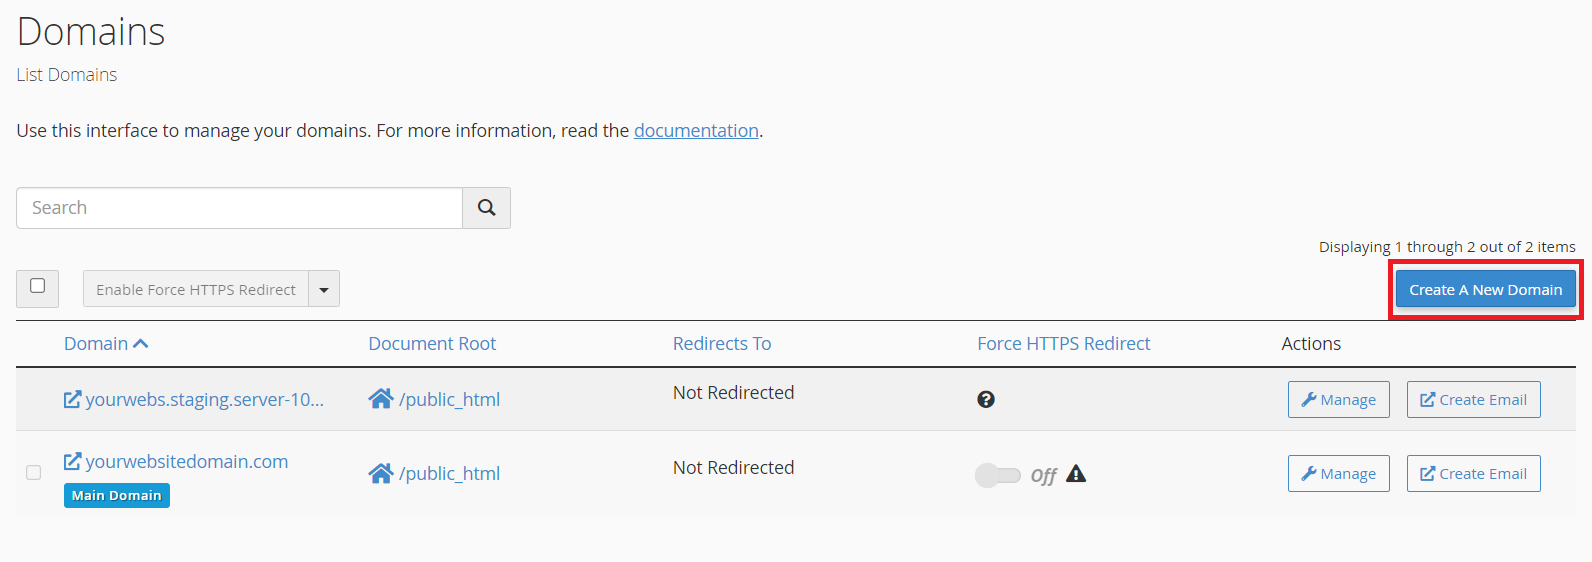
3. Once you have successfully logged into cPanel, proceed by locating the ‘Domains’ section. Then, click on the ‘Domains’ tool to access and manage your domain configurations seamlessly.

4. You will then be redirected to the Domains page. Kindly click on the ‘Create a New Domain‘ button.

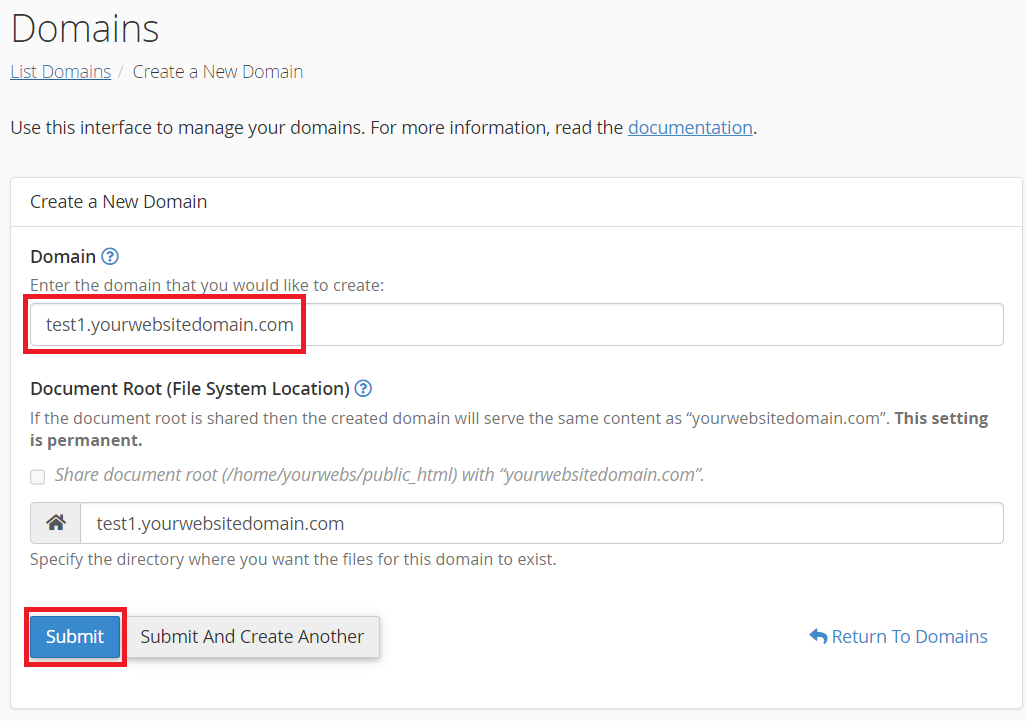
5. Once you are on the ‘Create a New Domain’ page, please enter your preferred subdomain in the domain input box. When you have finished, click the ‘Submit’ button to proceed with creating your subdomain.
Note: Make sure to uncheck the ‘Share document root‘ option.

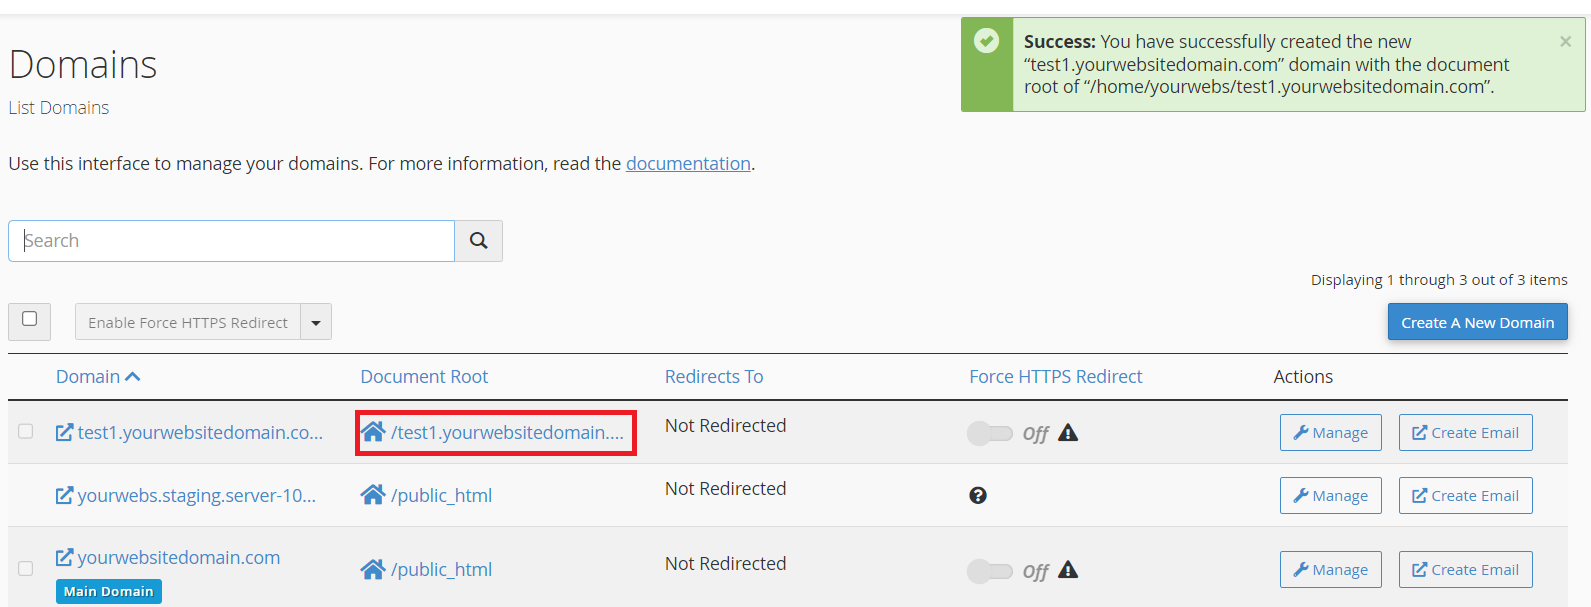
6. After your sub-domain is created, you will be redirected to the domains page. From there, you can click the link in the ‘Document Root’ column to access the file manager and begin uploading your site files. Alternatively, you can navigate to WP-Toolkit to start your WordPress instance or installation.

