JetBackup 5 is a robust and user-friendly backup solution integrated directly into cPanel, designed to simplify both backup creation and restoration processes. With JetBackup 5, administrators can easily schedule and manage backups of critical data—including website files, databases, email accounts, and more—ensuring that your digital assets remain secure and recoverable at all times.
This topic covers processes relating to a cPanel service.
You will need to be logged into the cPanel account to follow the steps.If you’re not sure how to access your cPanel service — please, follow this guide before continuing: How do I login to cPanel?
PLEASE NOTE: When restoring databases for e-commerce sites, exercise caution as ongoing orders or transactions may be in progress. Performing a restoration process could potentially disrupt or lose crucial data, impacting customer orders and transactions. Ensure that any backups used for restoration are up-to-date and carefully consider the timing of the restoration to minimize potential disruption to your e-commerce operations.
To create a backup #
1. Login to cPanel
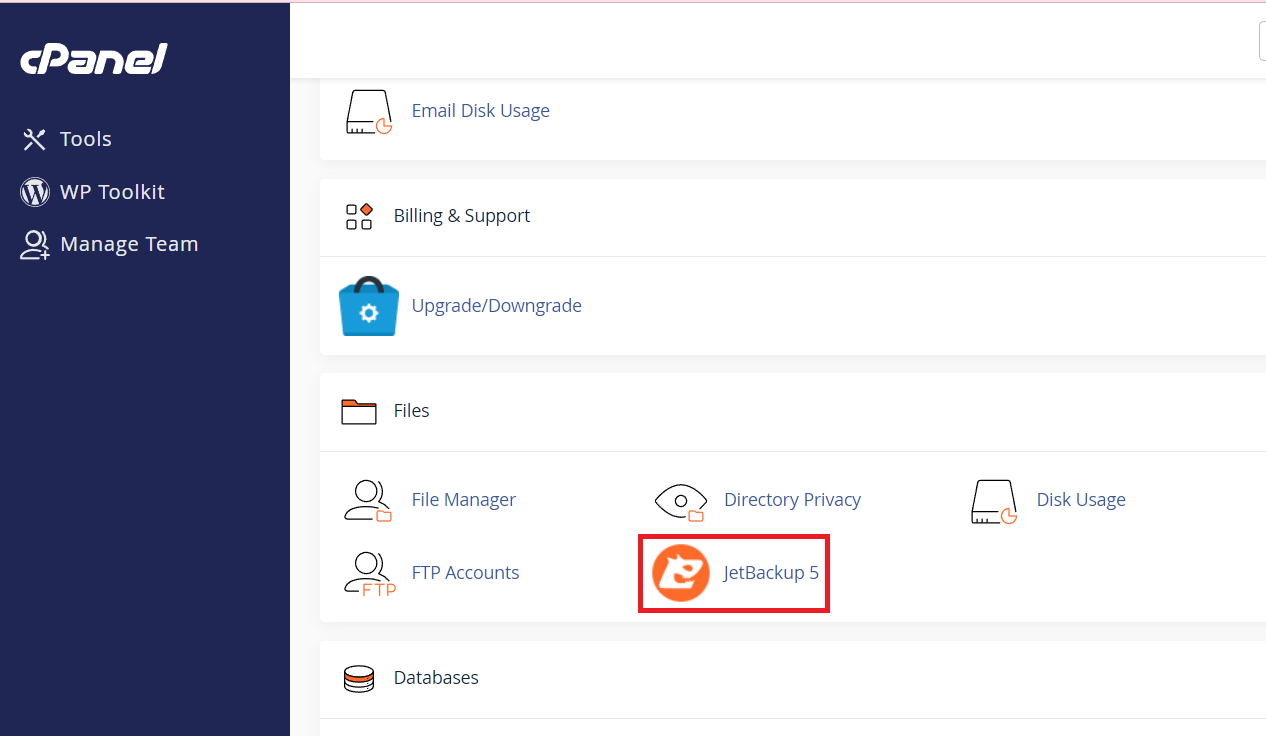
2. Find the ‘JetBackup 5‘ tool listed in the ‘Files’ menu.
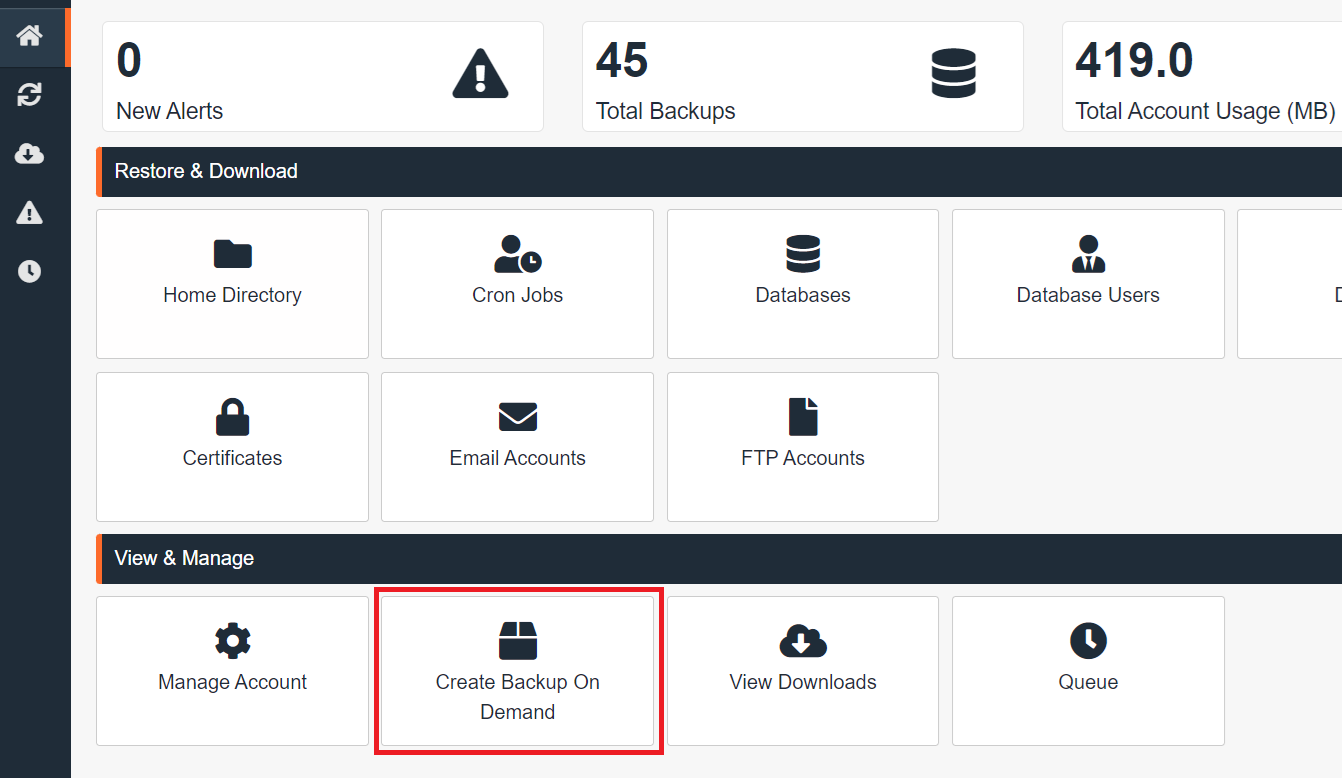
3. Click ‘Create Backup on Demand’.
4. Click the ‘OK‘ button to initiate your on-demand backup

5. Then you can go to ‘Queue’ to check the status of your backup process.
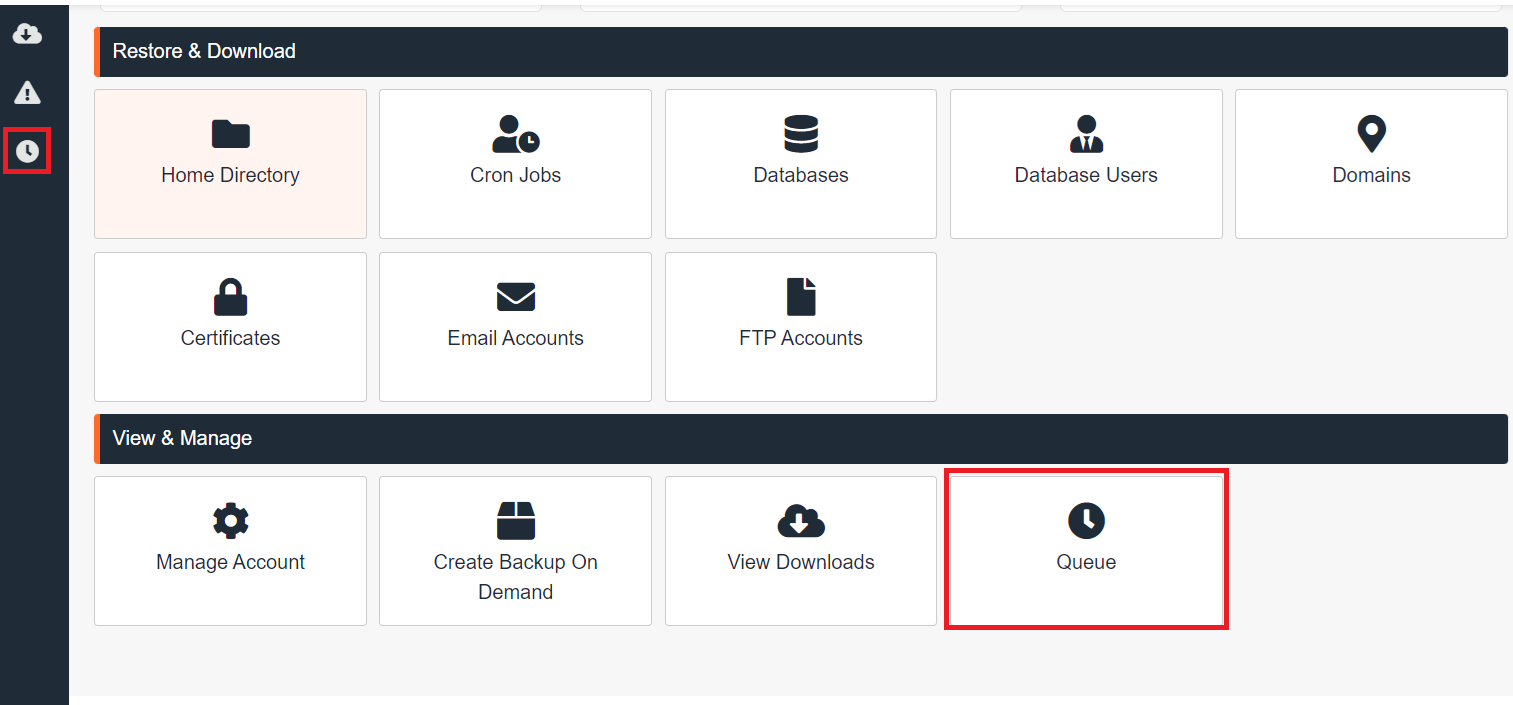
6. You will see a green check icon indicating completion when your backup has finished processing in JetBackup 5.

To restore files or databases #
As an example, this guide shows the steps to restore the WordPress config file (wp-config.php). The same steps can be used to restore any file or folder/directory.
Preparation
1. Login to cPanel
2. Find the ‘JetBackup 5‘ tool listed in the ‘Files’ menu.

Choosing the Correct Backup
3. Click ‘Home Directory’.
Note: To restore databases, go to ‘Databases’. Otherwise choose ‘Home Directory’ if restoring files/folders.
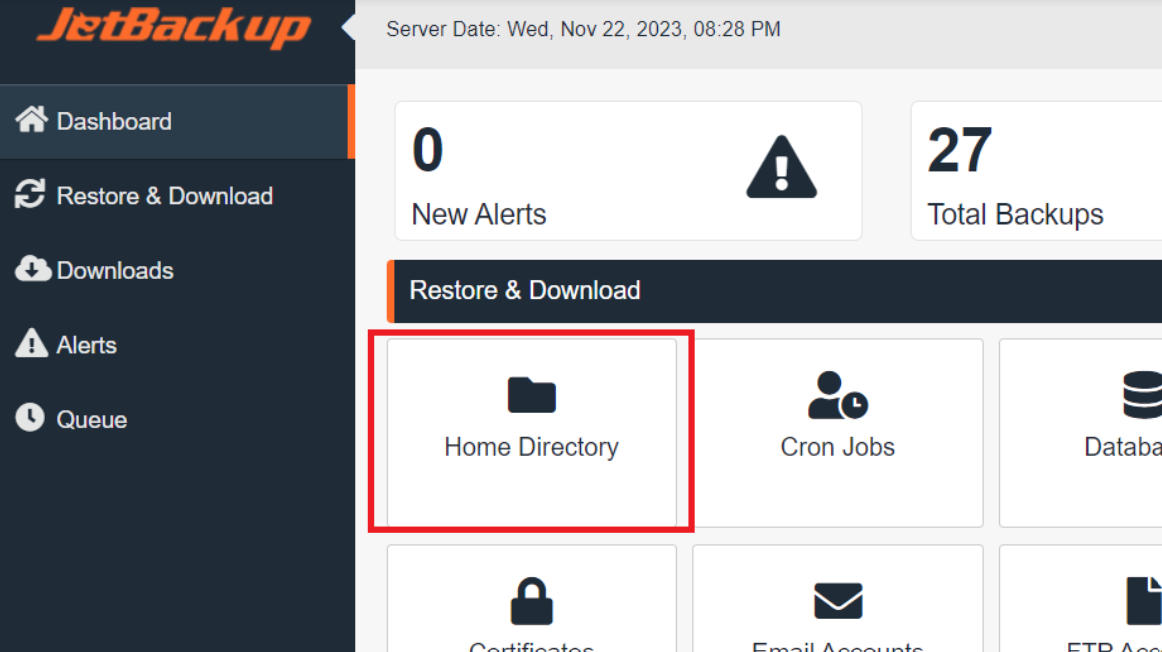
4. A list of available backups will be shown here.
- Find the one with the date that you want to restore from.
- The selection will be highlighted when moving the mouse over it, click the backup you want.
- Once selected, click the ‘Change File Selection‘ button that will appear in the ‘Selected Files’ column.
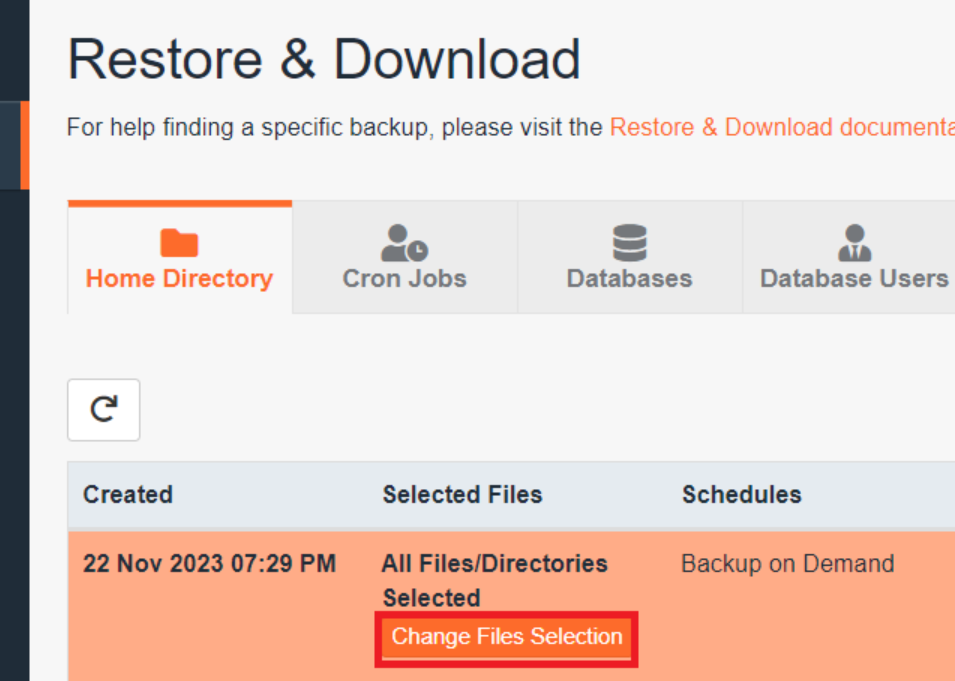
File Selection
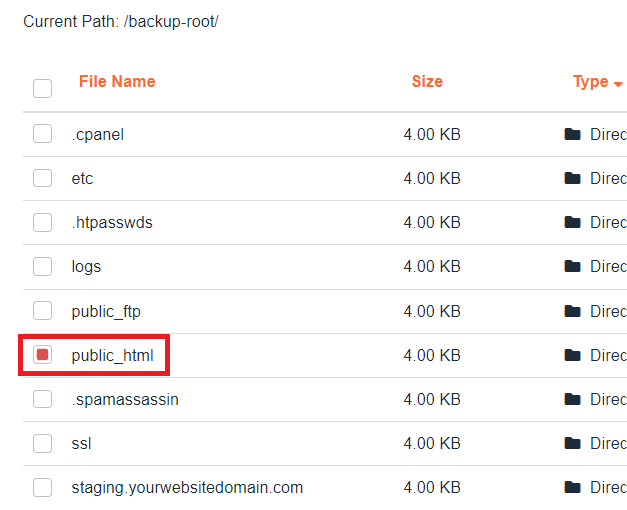
5. Next, a file selection window will appear. Find your site’s root directory (the default is ‘public_html‘). Click on the folder’s name to access the files inside.
Be sure to select the folders where your WordPress installation is located. If you are having trouble locating it, you can follow this guide: How to check my site’s root directory
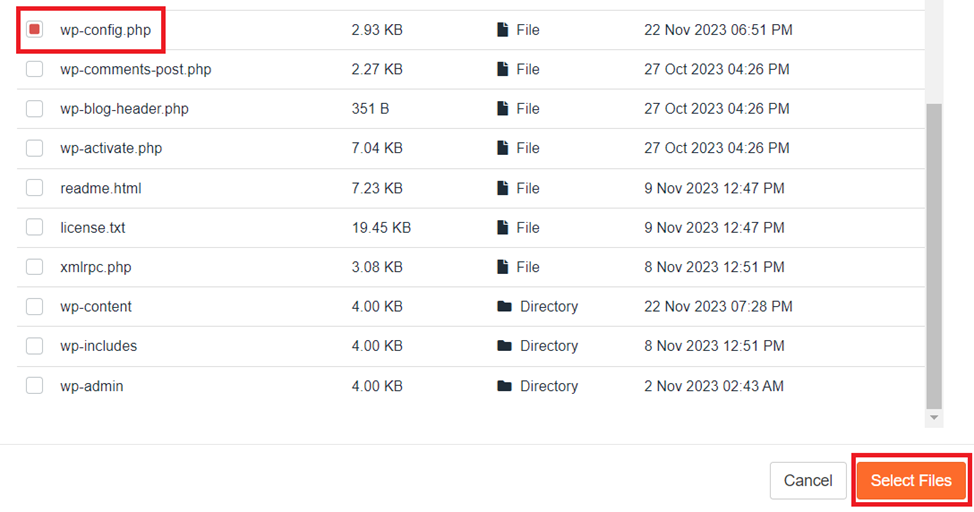
6. Select the ‘wp-config.php’ file by clicking the small checkbox next to the file name. Once the files you want to restore are selected, click the ‘Select Files‘ button.
Initiating the Restore
7. Next, click the ‘Restore‘ button.
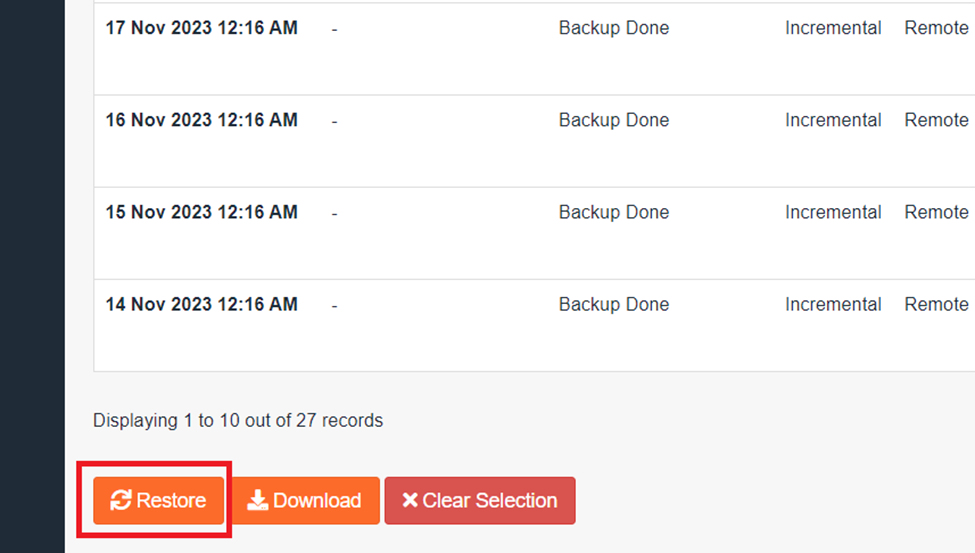
8. A ‘Restore Summary’ will be displayed, asking for a final confirmation before proceeding. To confirm, click the ‘Restore Selected Items‘ button.
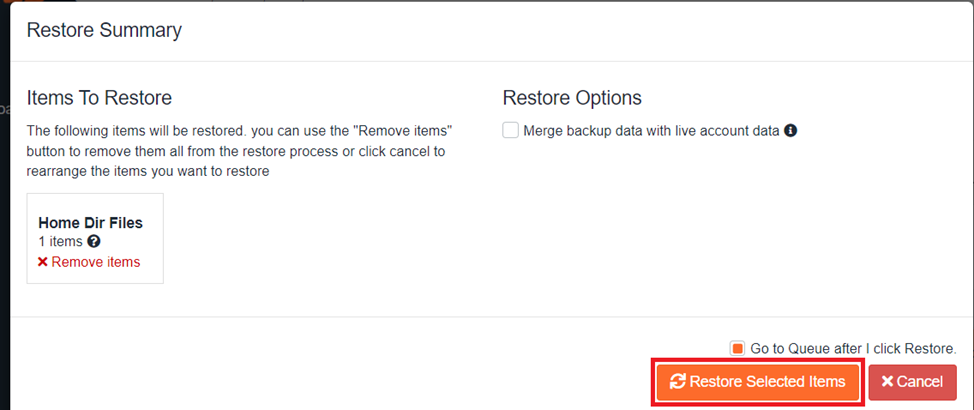
9. Next, you will be directed to the restore ‘Queue’, where you can view the details of the current restore/s. Once you see a green ‘completed’ tick in the status column, the restoration has finished.

10. Once you see a green ‘completed’ tick in the status column, the restoration has finished.
If you need further assistance conducting your backup restore, you can always send us a support ticket and we’d be happy to assist you.
To download JetBackup files or databases #
Preparation
1. Login to cPanel
2. Find the ‘JetBackup 5‘ tool listed in the ‘Files’ menu.

Selecting the Source
3. Click ‘Home Directory’.
Please note: if you want to download databases, navigate to the ‘Databases’ section; otherwise, if you’re downloading files or folders, choose ‘Home Directory’ instead.

4. A list of available backups will be shown here.
- Find the one with the date that you want to download from.
- As you move your mouse over the selection, it becomes highlighted. Then, simply click on the backup you want.
- After you’ve made your selection, click on the ‘Change File Selection’ button, which appears in the ‘Selected Files’ column.

File Selection for Download
5. Subsequently, a file selection window appears. Then, locate your site’s root directory (typically named ‘public_html’) and click on the folder’s name to access its contents.
Please note: if you want to access the files inside a folder, click on the folder’s name. Alternatively, if you’d prefer to select the entire folder along with its contents, click the small checkbox next to the folder’s name.
Ensure that you select the folders containing your WordPress installation. Furthermore, if you have trouble finding these folders, refer to this guide for assistance.: How to check my site’s root directory
Alternatively, if you wish to download your entire website, simply select the public_html folder, click the ‘Select Files’ button, and then skip step 6.
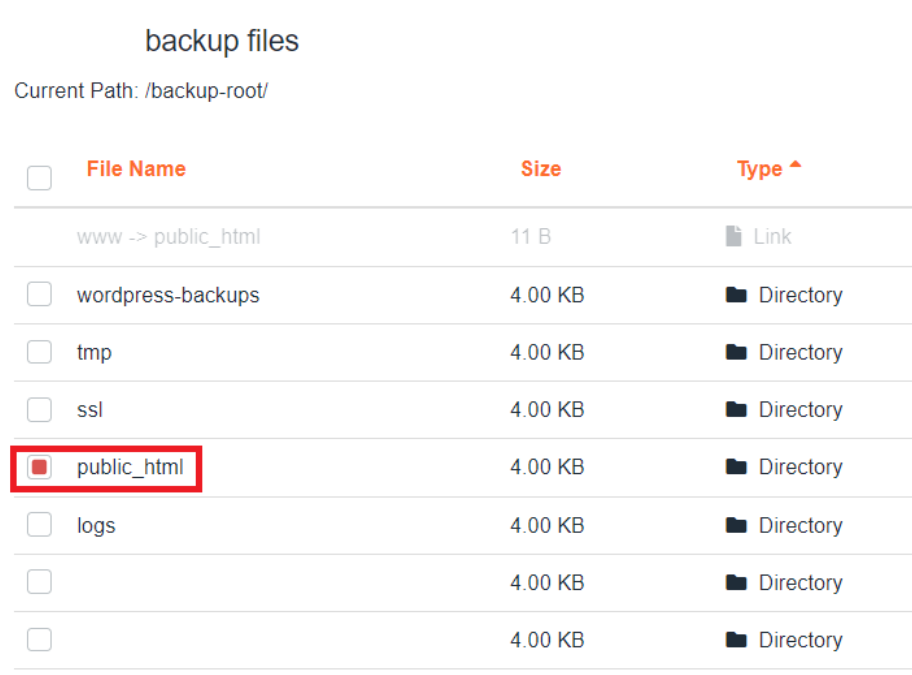
6. First, select the ‘wp-config.php’ file by clicking the small checkbox next to its name. Then, after you have chosen all the files you wish to download, click the ‘Select Files’ button.

Initiating the Download
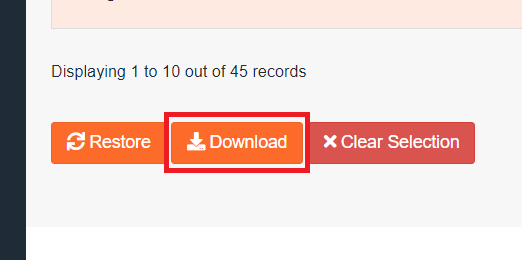
7. Next, click the ‘Download‘ button.
8. Subsequently, a ‘Download Summary’ appears, prompting you for final confirmation before proceeding. Once you review it, simply click the ‘Download Selected Items’ button to complete the process.
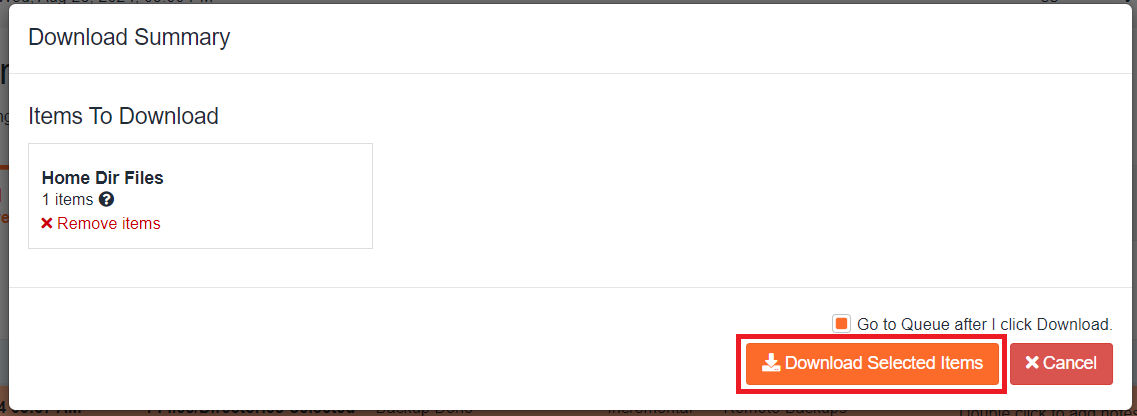
9. Immediately after redirection, the download Queue appears on your screen, allowing you to review the details of your current downloads. Then, once a green ‘completed’ tick shows in the status column—confirming that the download archive has finished—you simply click the cloud icon with the downward arrow symbol to proceed.

10. Once you reach the download page, you immediately see a list of all the download archives you have created. Then, to download your backup to your computer, simply click the ‘Download‘ button on the right side of the corresponding archive.

