Setting up New Outlook is the first step to enjoying Microsoft’s modern, streamlined email experience. In this guide, you’ll learn how to set up New Outlook with ease so you can seamlessly integrate your email, calendar, and contacts into one powerful application.
Whether you’re new to Outlook or upgrading from an older version, our detailed instructions help you set up New Outlook quickly, enabling you to take full advantage of its enhanced features and improved performance.
Before you get started, you’ll need to know a few pieces of information such as the email username, password and mail server address.
Email username & password #
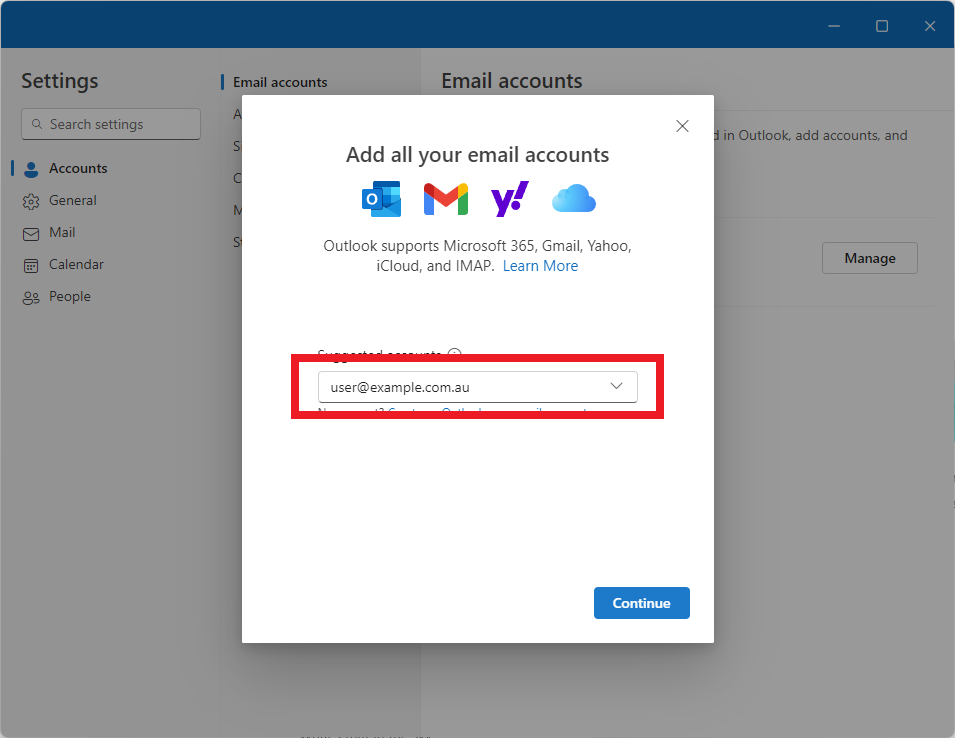
- Your email username is your full email address. It includes everything before and after the “@” symbol (e.g. user@example.com.au).
- You set the password when you create the mailbox in cPanel. Use this password to connect to Outlook. If you don’t know or have forgotten your password, you can reset it using this guide: How to change cPanel-hosted email address password: How to change cPanel-hosted email address password?
Server address / Hostname #
To find your cPanel hosting service’s server address/hostname;
- Log in to cPanel via the Network Dynamics Client Area.
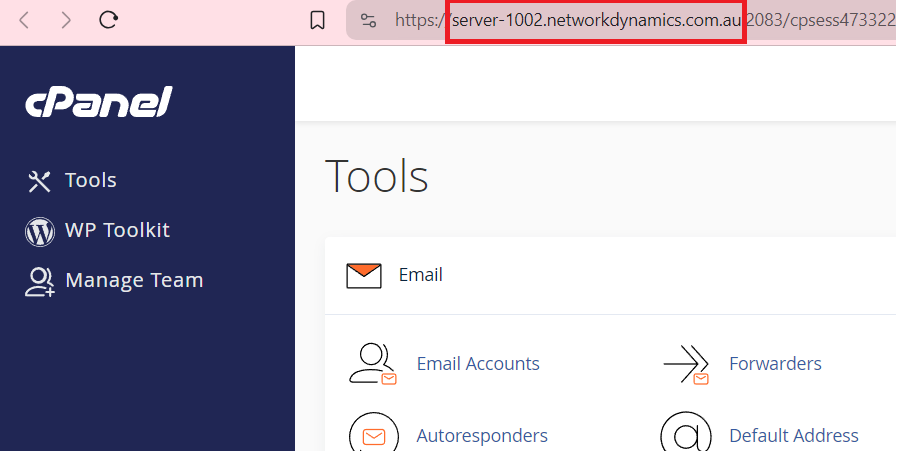
- After you log in, check the URL in your browser’s address bar.
- The hostname appears in the following format:
- server-XXXX.networkdynamics.com.au
NOTE: In the example below, this particular hosting service is on ‘server-1002.networkdynamics.com.au‘. Be sure to take note of the address you see when logging into cPanel as yours may be different.
Configuring Outlook #
Now that you have the username, password and server address, you’re ready to connect your mailbox to Outlook.
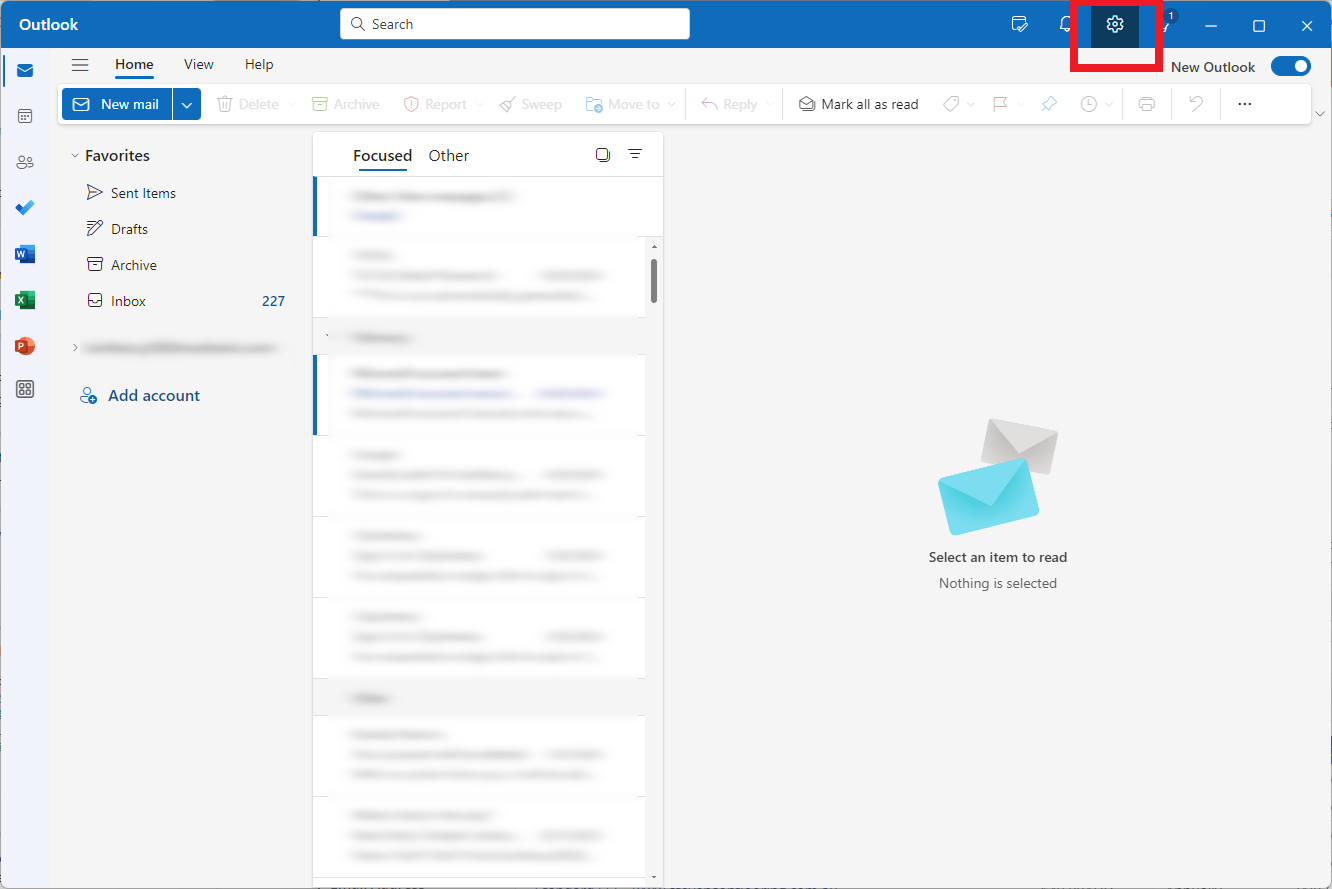
1. From the main screen, click the ‘Settings‘ button (cog/gear icon) in the top right
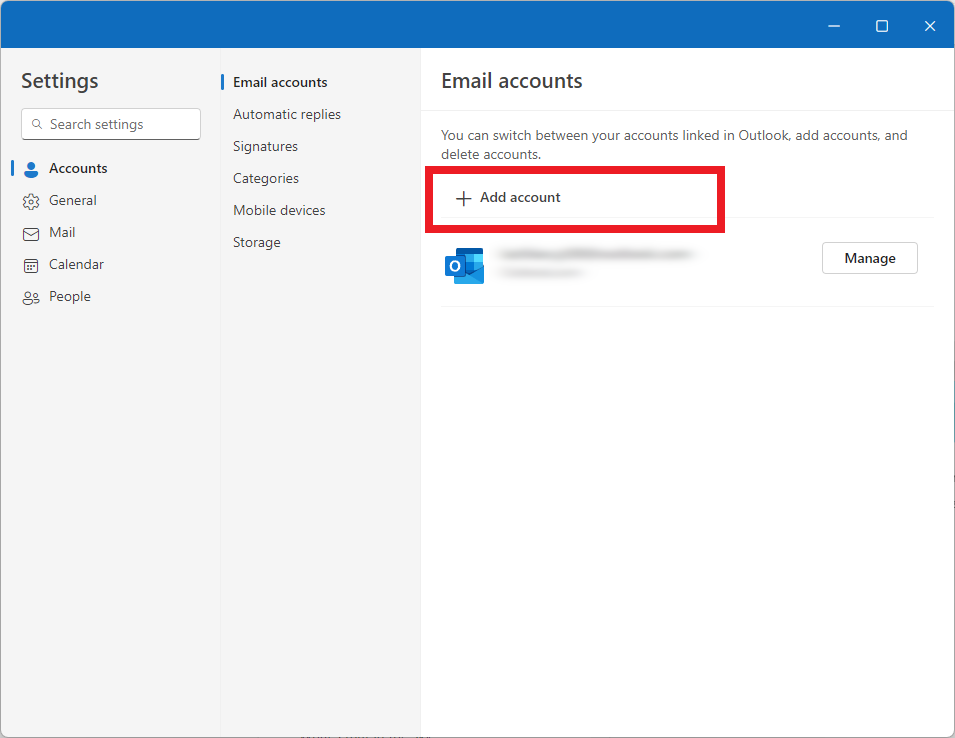
2. Select ‘Add account‘
3. Enter the email address (username) of the account you’d like to configure, then click ‘Continue‘
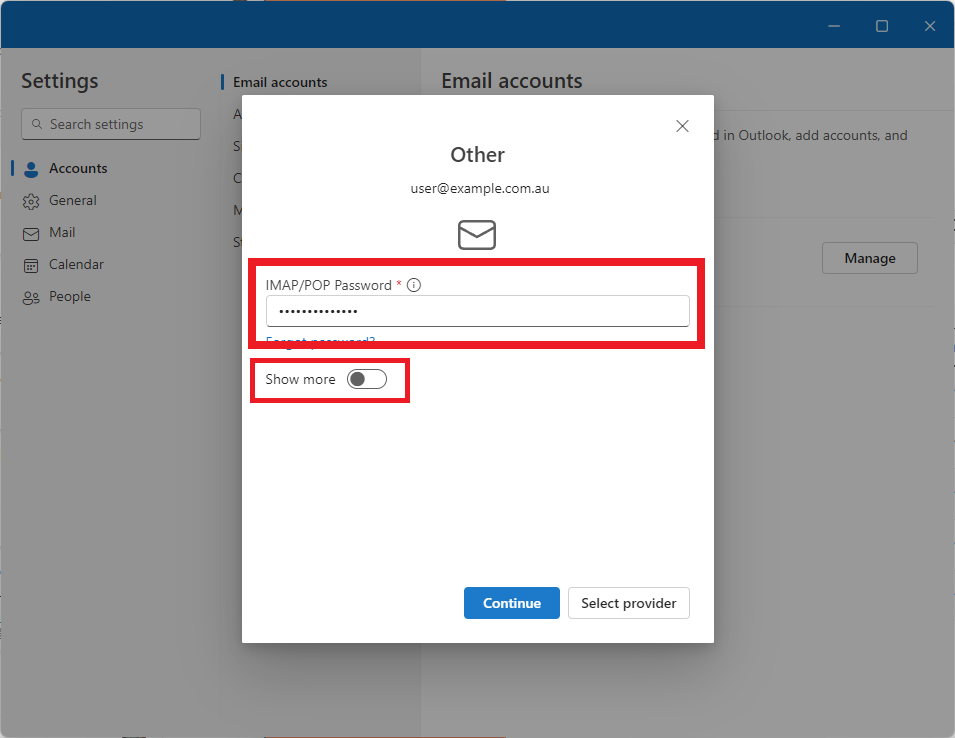
4. Enter the password for the email address and toggle the ‘Show more‘ button to reveal additional settings
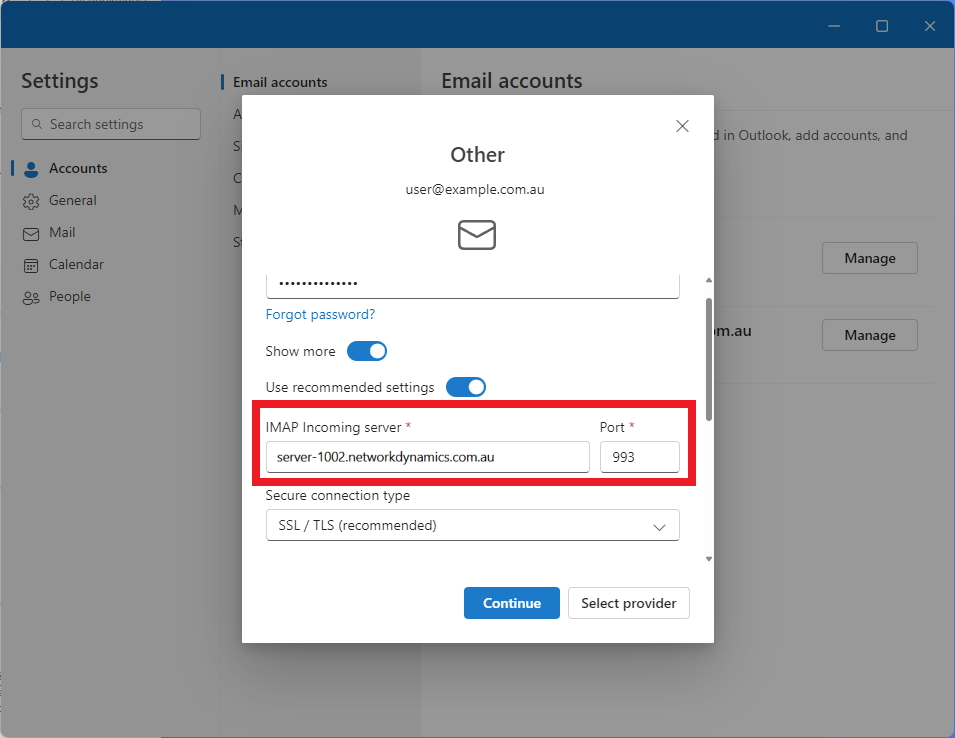
5. In the ‘IMAP Incoming server‘ field, type the server address you identified earlier in the guide. ‘Port’ and ‘Secure connection type’ settings should be pre-filled, otherwise use the settings below:
- IMAP Incoming server: server-XXXX.networkdynamics.com.au
- Port: 993
- Secure connection type: SSL/TLS (Recommended)
NOTE: Be sure to replace the X’s to match the server number of your hosting.
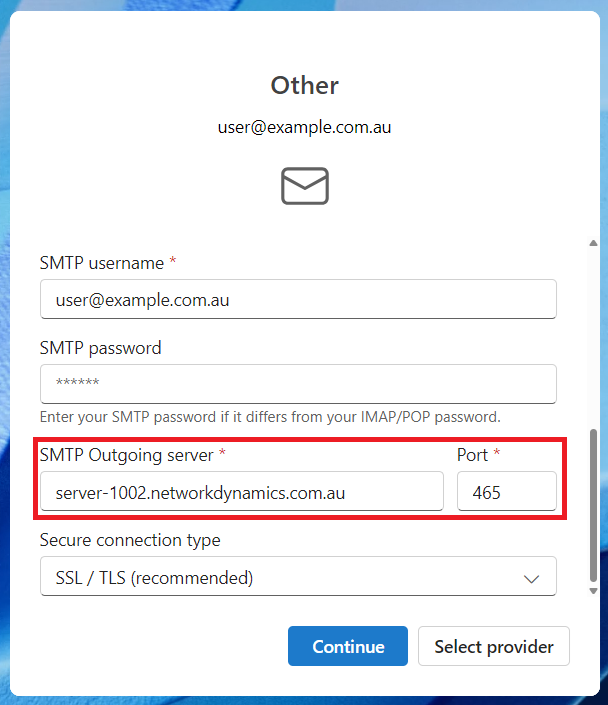
6. Type the server address into the ‘SMTP Outgoing server‘ field. ‘Port’ and ‘Secure connection type’ settings should be pre-filled, otherwise use the settings below:
- SMTP Outgoing server: server-XXXX.networkdynamics.com.au
- Port: 465
- Secure connection type: SSL/TLS (Recommended)
NOTE: The IMAP (incoming mail server) and SMTP (outgoing mail server) will be the same.
7. Add your username and password into the ‘SMTP username‘ and ‘SMTP password‘ fields above the server address if they are not already pre-filled.
8. Click ‘Continue‘ when you’re done. Outlook will take a few moments to finish setting up the account before showing a “Success!” message.
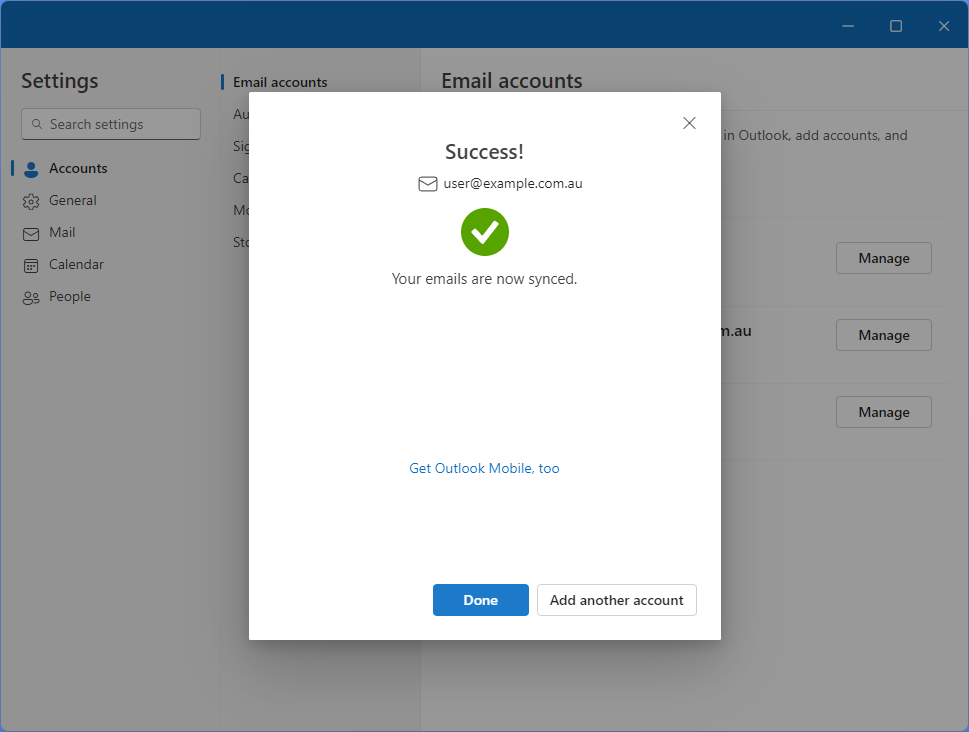
You’re now ready to use Outlook to send and receive email from your cPanel-hosted email account!
