How to Install WordPress on CloudPanel begins with a simple yet powerful process that enables you to set up your website quickly and securely. In this guide, we start by logging into your CloudPanel account and configuring essential settings. Next, we walk you through the database setup and WordPress installation steps. Moreover, we provide practical tips to streamline the process. Ultimately, by following these clear instructions, you’ll enjoy a fully functional WordPress site hosted on CloudPanel in no time.
Step-by-Step Installation Guide
1. First, log in to your CloudPanel.
2. After you successfully log in, your server’s dashboard appears. Then, locate the ‘Add Site’ button to start creating your WordPress site.

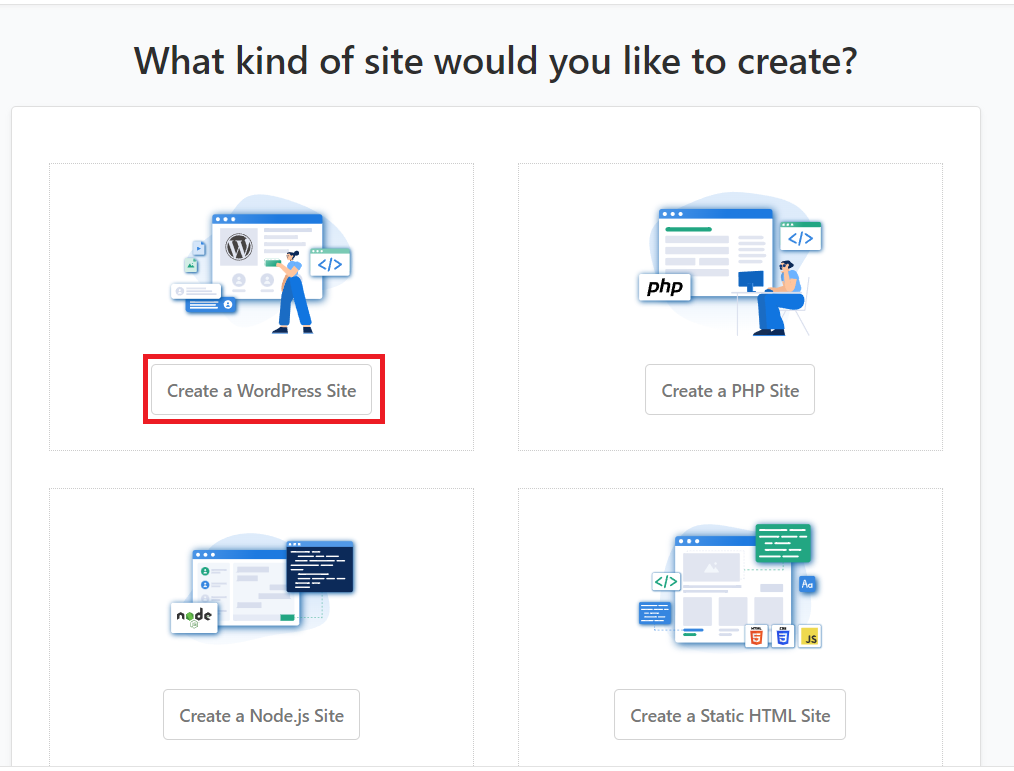
3. Next, after you review the available site templates, click on “Create a WordPress Site.”.

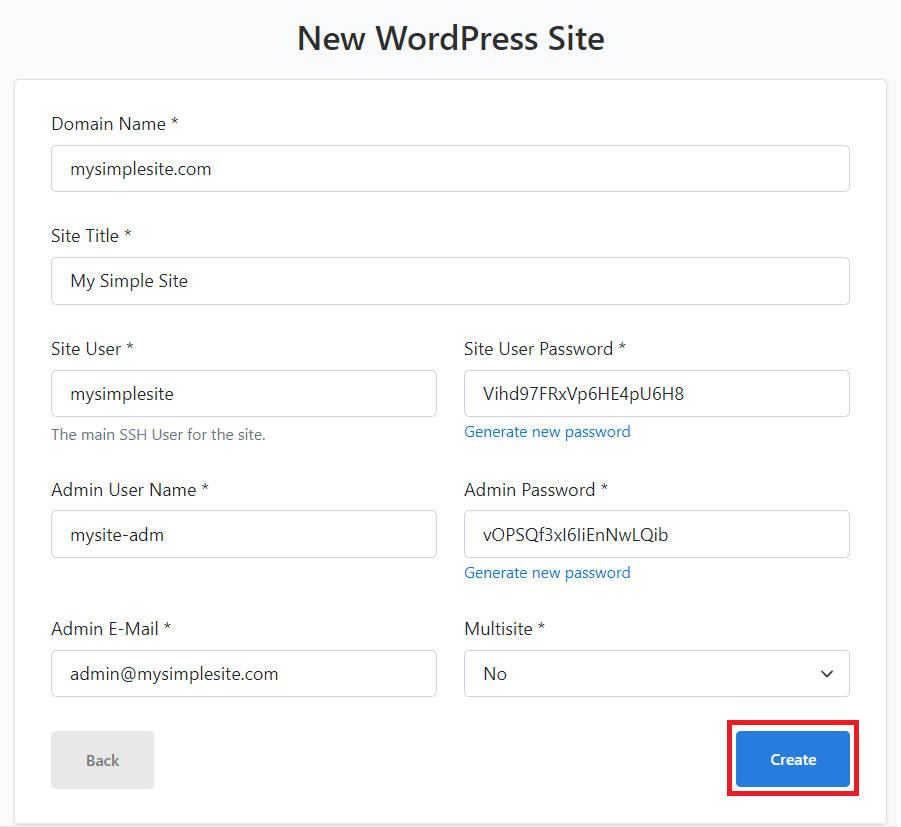
4. First, fill in the basic details needed to create your WordPress site; then, once you’ve finished, click ‘Create.’

- Domain Name – The domain name is the web address people use to access your site, like “example.com.” It’s how visitors find you online, and it should be easy to remember and relevant to your content. You typically purchase a domain name from a domain registrar and if you don’t have one yet you can purchase one when you click this link: Network Dynamics Domain Registration.
- Site Title – The WordPress site title is the name of your website that appears in the header and on search engines. It helps visitors identify your site and can be different from the URL.
- Site User – This will be your SSH user.
- Site User Password – Your SSH password for your SSH user.
- Admin User Name – Your login username is clearly displayed in the account details section.
- Admin Password – Similarly, your site login password appears next to your username for quick reference.
- Admin E-Mail – Your WordPress site user email.
- Multisite – Usually set ‘No’ to default, a sample use of WordPress Multisite could be a network of blogs for a university, where each department has its own site (e.g., “science.university.edu.au,” “arts.university.edu.au”) managed under one WordPress installation, allowing centralized control over themes, plugins, and user access.
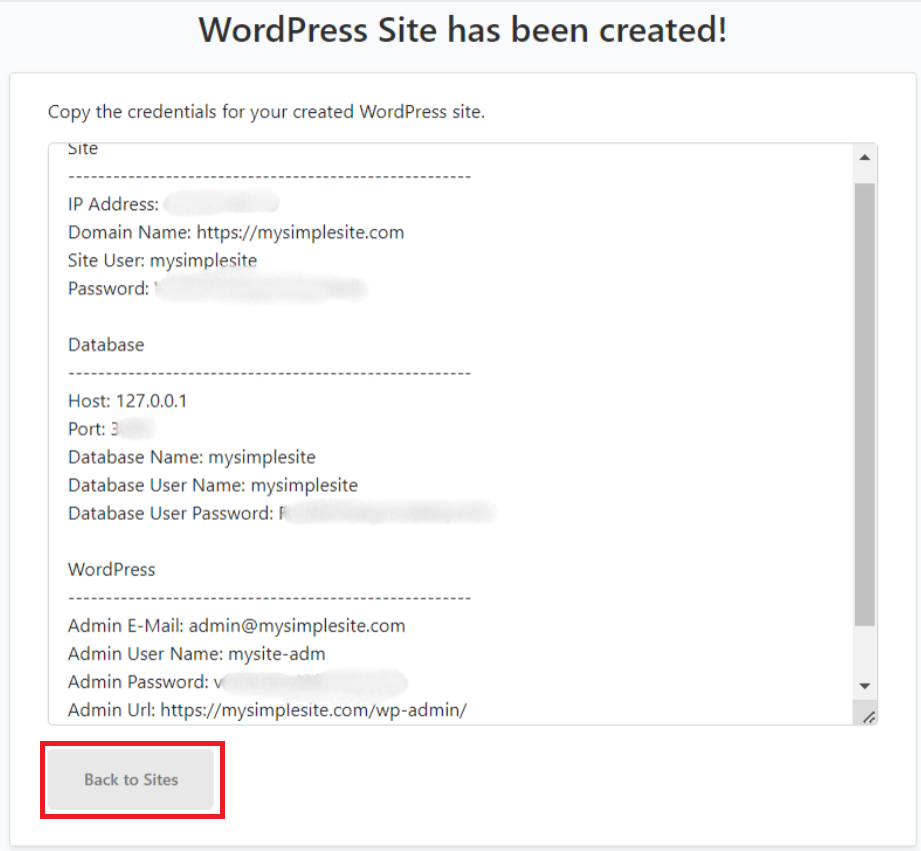
5. Once your site is created, you will see your WordPress site credentials. You can then log in to your WordPress site using the details provided in the WordPress section. Please copy and paste this into a text file or a secure location that only you or your administrator knows about. Once you’re done, you can click the ‘Back to Sites‘ button.

6. You will then be redirected to your site’s dashboard, where you can start logging into your WordPress site using the Admin URL mentioned in step 5.
