This topic covers processes relating to a cPanel service.
You will need to be logged into the cPanel account to follow the steps.
If you’re not sure how to access your cPanel service — please, follow this guide before continuing: How do I Login to cPanel?
Introduction #
At Network Dynamics, we know that effective team management is key to a secure hosting environment. In this guide, we explain how to create a cPanel Teams user step by step, enabling you to assign precise permissions and streamline collaboration.
First, you’ll learn how to set up a new team user, ensuring your account remains secure while granting necessary access. Then, we detail how to manage and customise user roles so that every team member can work efficiently.
Ultimately, this guide empowers you to enhance your workflow and maintain robust security measures for your hosting services.
To create a cPanel Teams user #
1. First, login to cPanel
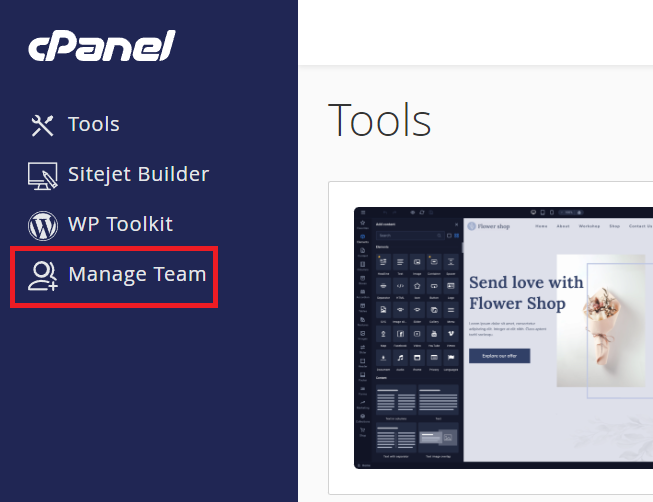
2. Click ‘Manage Team‘ from the vertical menu on the left

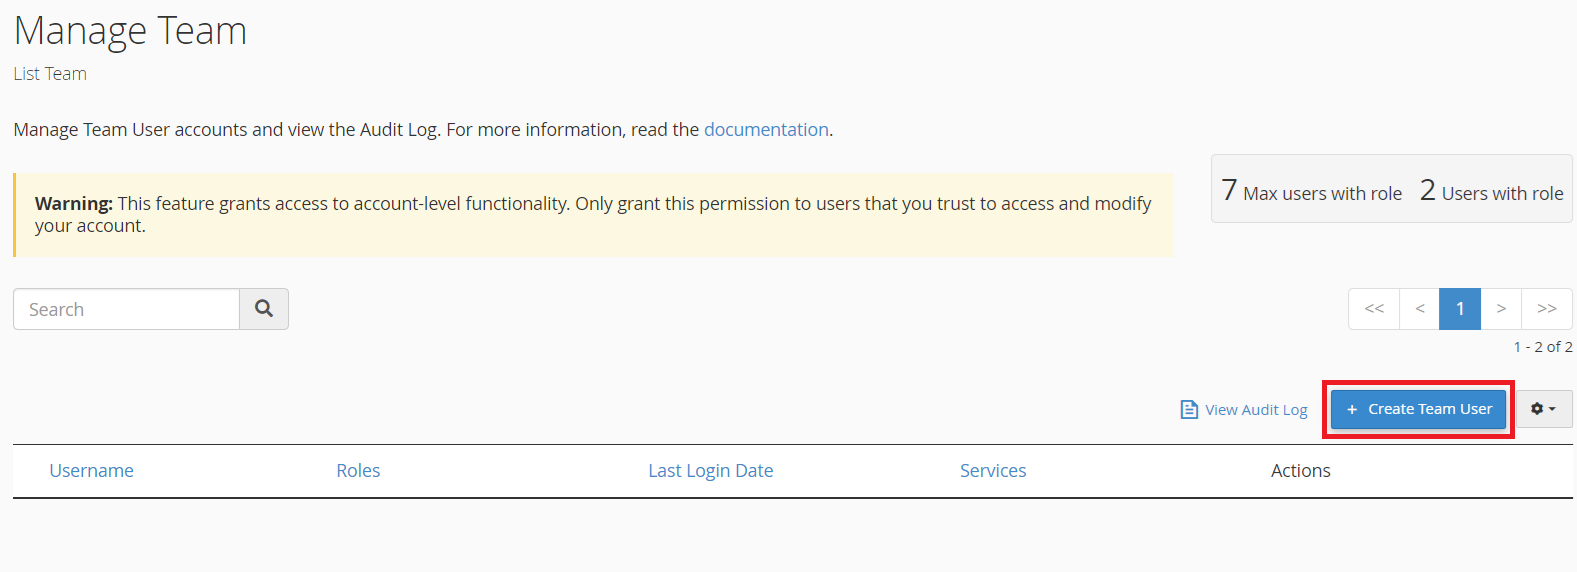
3. From the Mange Team page, click ‘Create Team User‘

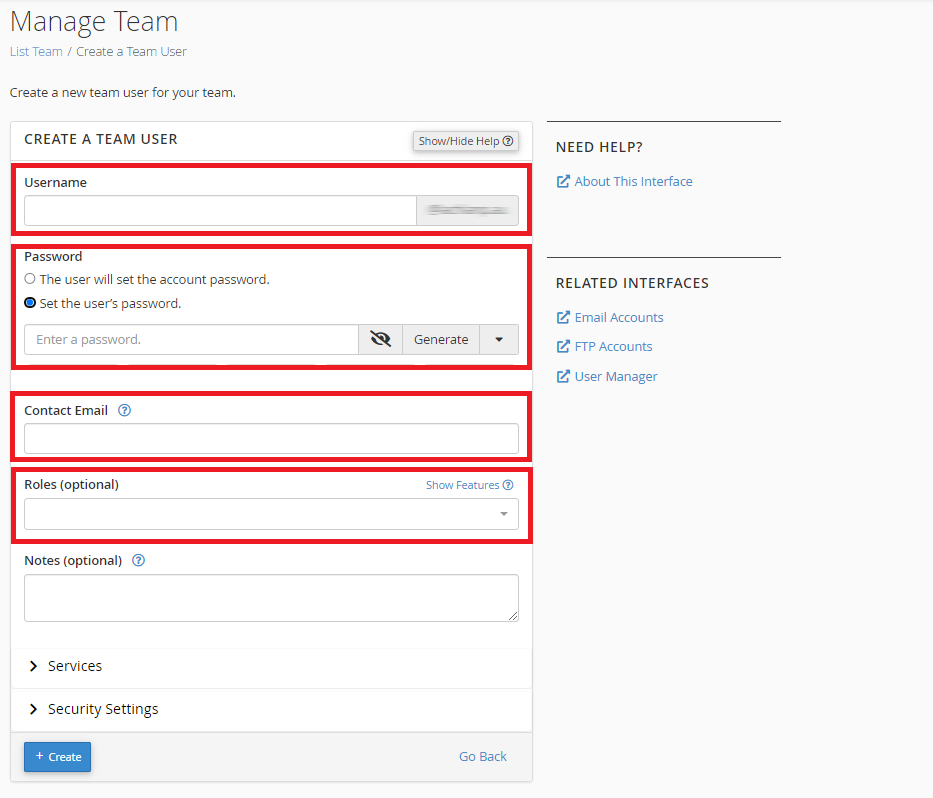
4. Configure the Team user’s details by filling in the username, password, contact email and user roles.
- Username – The name you choose here will be prepended to the domain to create the full username (e.g. user@domain.com)
- Password – Create a password or allow the user to set their own
- Contact email – The email of the intended user. Used to set/reset passwords
- Roles – Specify the features and permissions this user should have

Roles
When selecting a role for the Team user, choose the option that is most appropriate to your situation.
If you’re not sure which features the Team user will need, the Administrator role will allow access to all features.
- Administrator
This role includes all privileges of the other team user roles.
- Database
This role gives access to files and tools related to databases, such as phpMyAdmin, and SQL Databases/Manage My Databases.
- Email
This role gives access to tools and settings related to email, such as Email Accounts, Forwarders, Zone Editor and Track Delivery.
- Web
This role gives access to tools and files related to website functionality, such as WordPress Toolkit, Redirects and PHP options.
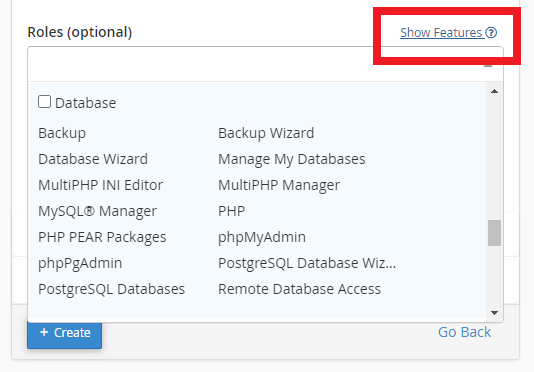
PLEASE NOTE: For a full list of each role’s privileges, click the ‘Show/Hide Features ?‘ icon to the right of the ‘Roles’ drop-down menu

5. Optionally, you can also set ‘Services’ and ‘Security Settings’
- Services
- Email – Gives the team user access to email for the cPanel account.
- FTP – Gives the team user access to website files for the cPanel account
- Security Settings
- This allows you to set an expiration date for the Team user account
- Choose an expiry date and account access will be revoked on that date.
6. When you’re done filling in the required information, scroll to the bottom and click the ‘Create‘ button.
The new Team user can now log in to cPanel directly by typing “/cpanel” or “:2083” after your domain name using the username and password you created.
e.g. http://yourdomain.com.au/cpanel or http://yourdomain.com.au:2083
PLEASE NOTE: If your domain points away from Network Dynamics Hosting, use the server hostname to log in to cPanel. Moreover, find the hostname in the address bar after login—it typically appears as “server-XXXX.networkdynamics.com.au.”
Conclusion #
Overall, creating a cPanel Teams user is a straightforward process that enhances collaboration and strengthens your account security.
Furthermore, following this guide allows you to efficiently manage user permissions while maintaining a secure hosting environment.
