
This topic covers processes requiring access to your Network Dynamics Area. If you’re not sure how to access the Client Area, please follow this guide before continuing – How do I Login to my Network Dynamics Hosting Client Area?
Backing up your DNS zone is an essential part of managing your domain. With JetBackup 5, you can quickly generate or restore a DNS backup via cPanel. This guide outlines how to perform a JetBackup 5 cPanel backup for your DNS zone so you’re protected in case of accidental changes, deletions, or migration issues.
What is a DNS zone?
A DNS zone stores all the DNS records for your domain – including A, MX, TXT, and CNAME records – which control how services like websites, emails, and subdomains function. In cPanel, each domain has its own DNS zone, which can be managed via the Zone Editor or JetBackup.
Why back up your DNS zone?
Performing a DNS zone backup ensures you can recover quickly if something goes wrong. Whether you’re updating records, migrating services, or troubleshooting an issue, having a backup helps minimise downtime.
Benefits of backing up your DNS zone:
- Prevent data loss from accidental changes or deletions
- Restore DNS settings after server or account migration
- Peace of mind before performing DNS updates
A cPanel DNS backup with JetBackup 5 is a simple yet powerful way to secure these configurations.
Steps to back up your DNS zone using JetBackup 5
Follow the steps below to manually back up your DNS zone using JetBackup 5:
1. Log in to your cPanel account.
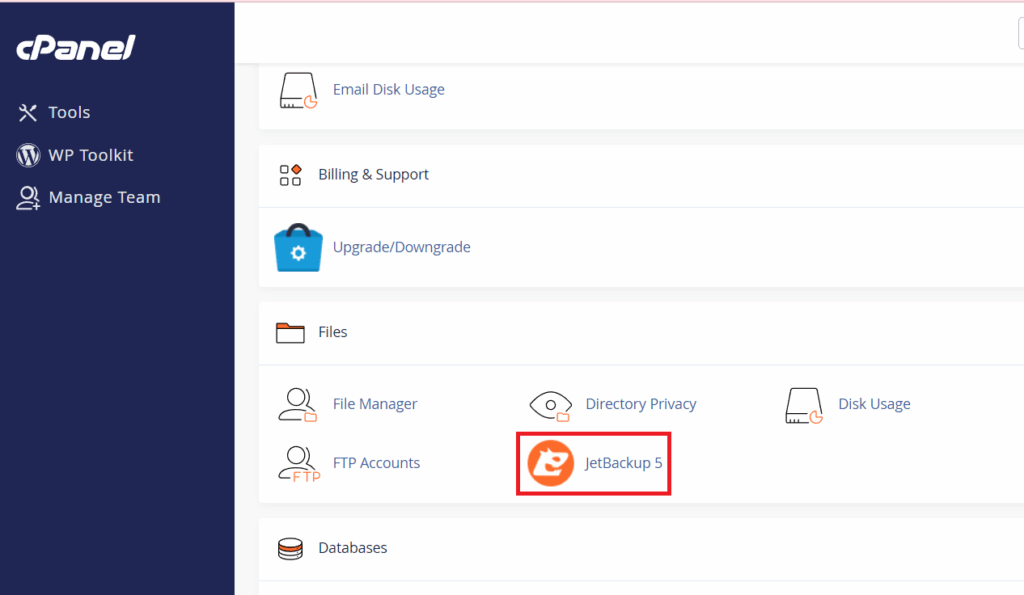
2. Navigate to the JetBackup 5 section. Look for the ‘JetBackup 5‘ icon and click on it.
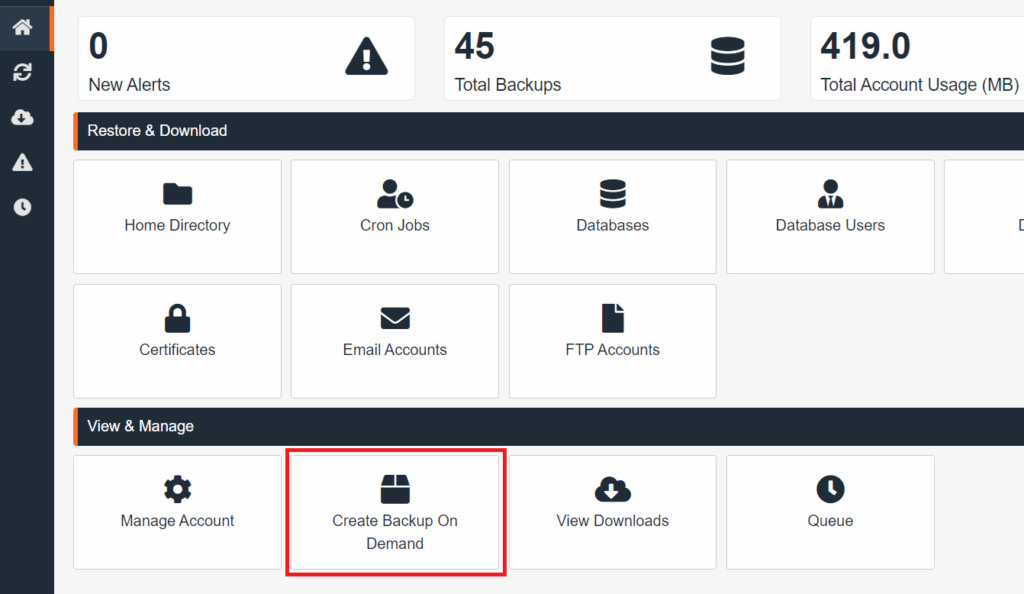
3. Click on ‘Create Backup On Demand’ if you want to generate a backup on the fly (optional). If you only need to download a backup from a previous day, you can skip this step.
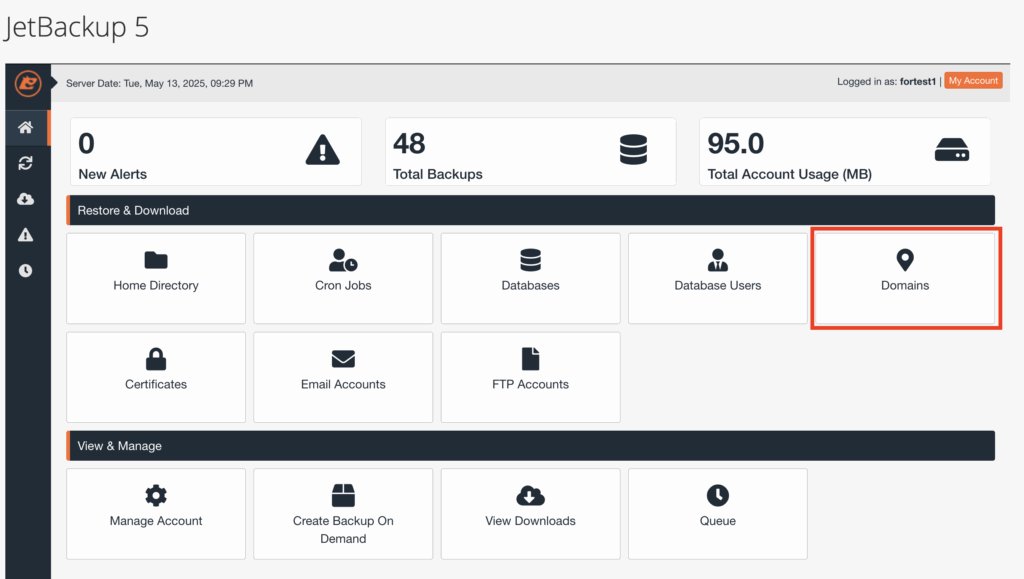
4. Under the Restore & Download section, select ‘Domains’.
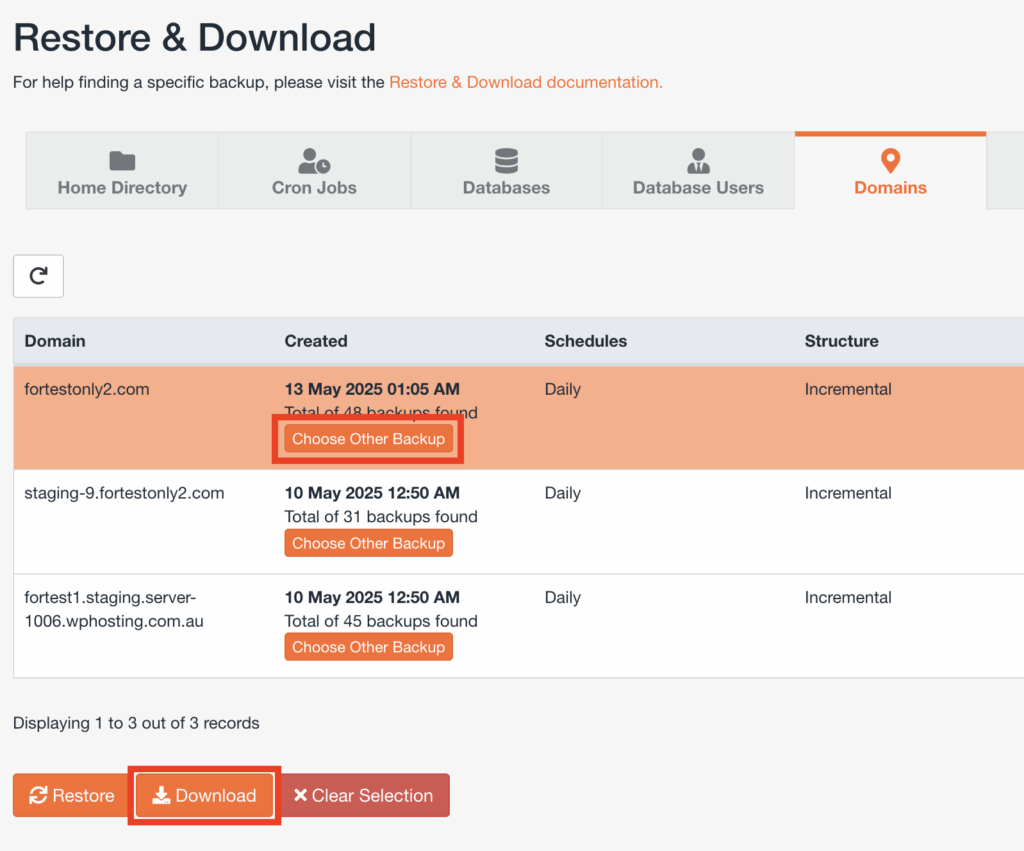
5. Then, on the Restore & Download page, click on ‘Choose Other Backup’ to select the date of the backup you want to download. Once you’ve selected the date, click ‘Download’ to begin the download.
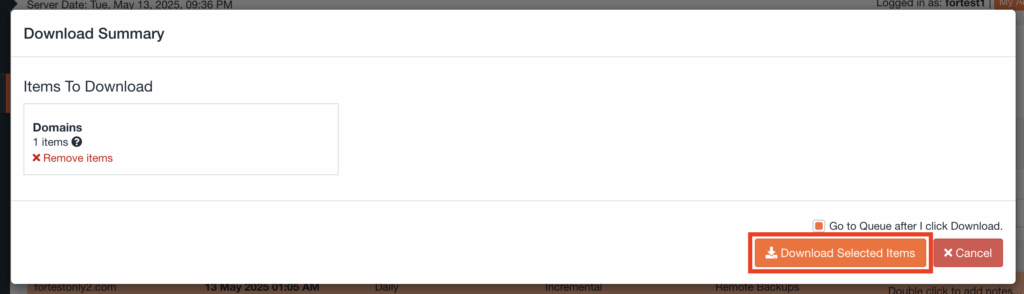
6. A Download Summary pop-up window will appear. Click ‘Download Selected Items’ to start the download.
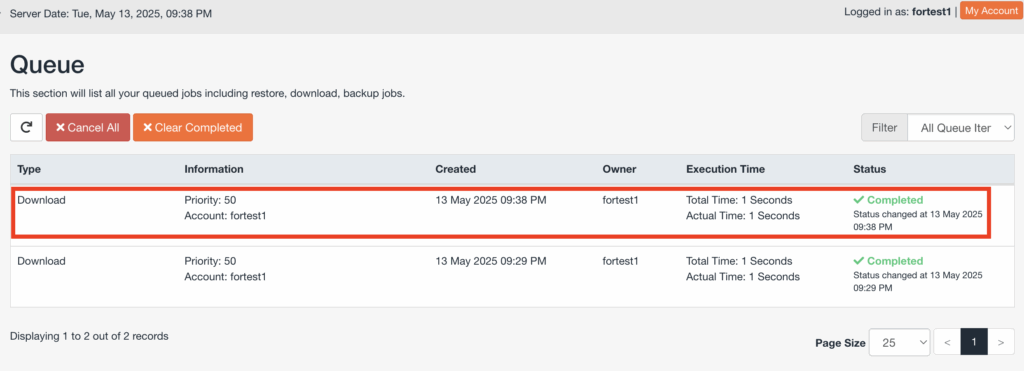
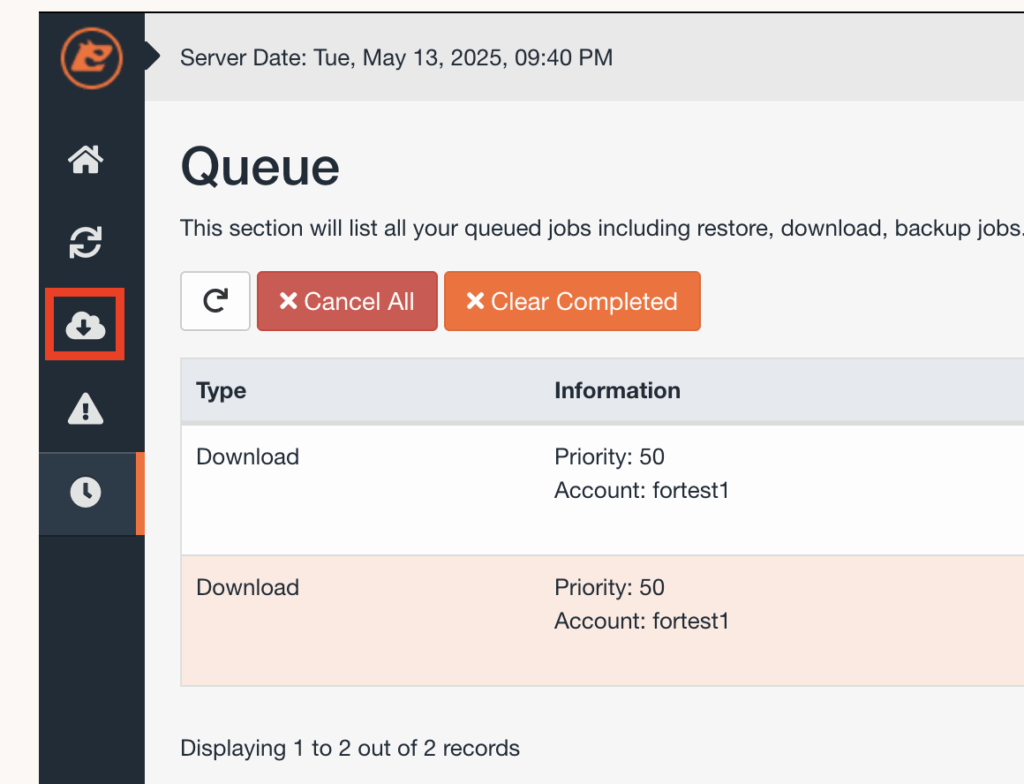
7. You’ll then be redirected to the Queue page. Once the download is complete, it will appear in the list. Click the ‘download icon‘ (cloud with a downward arrow).
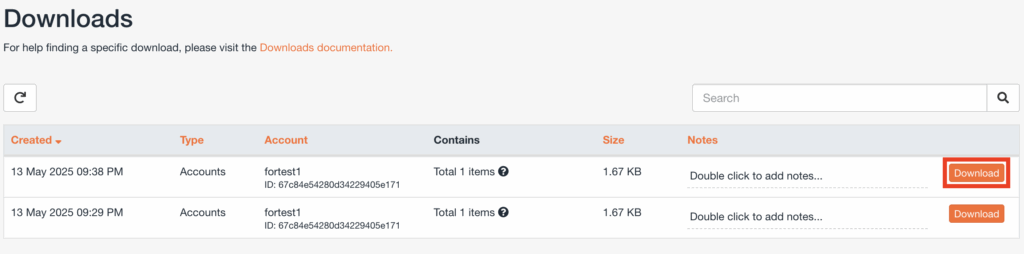
9. After that, you’ll be redirected to the Downloads page. Then, your most recent download will appear at the top of the list, click ‘Download’ to save it to your device.
How to restore a DNS zone
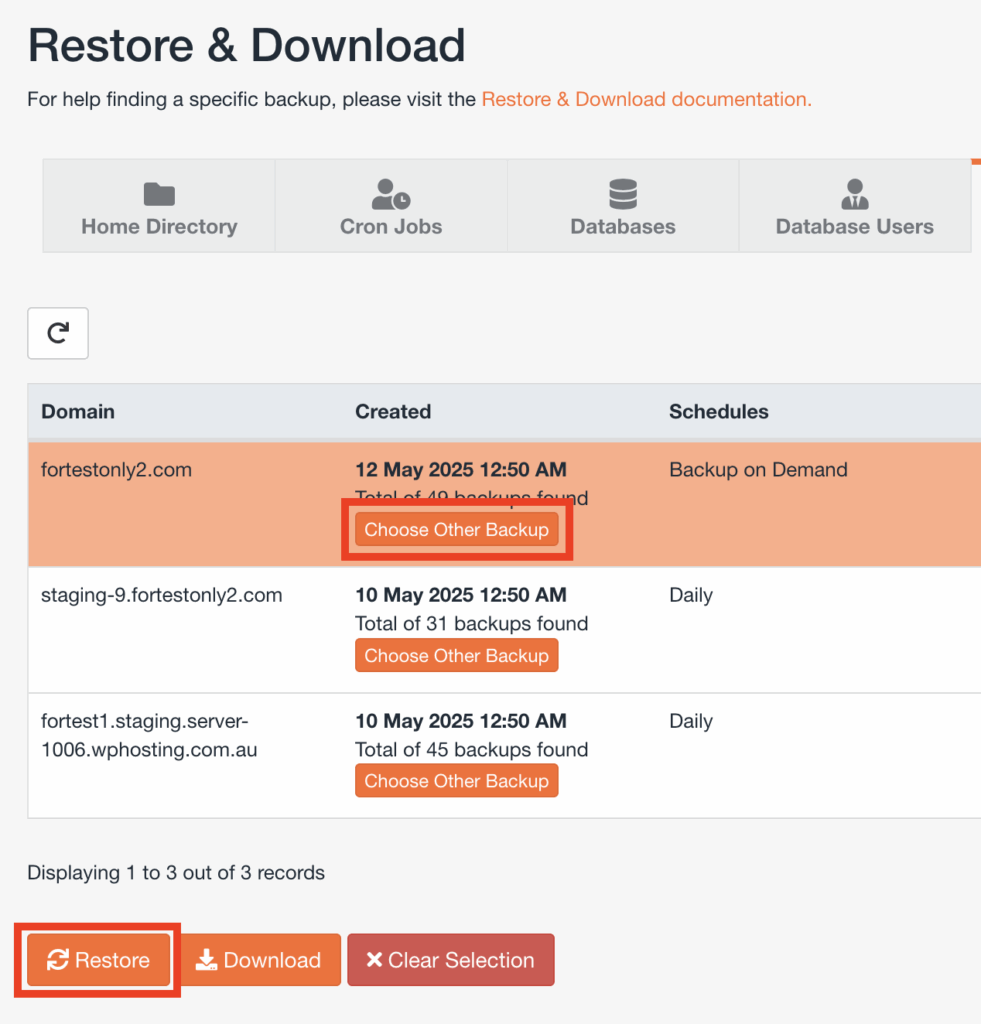
1. Follow the “Steps to backup DNS zone” section up until step 5. Then, from there, click the date that you want to restore from. Next, click ‘Restore‘.
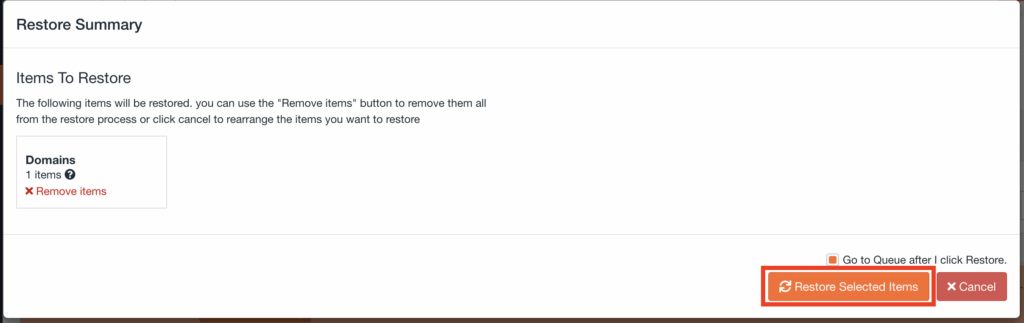
2. Then on the Restore Summary page, click the ‘Restore Selected Items‘.
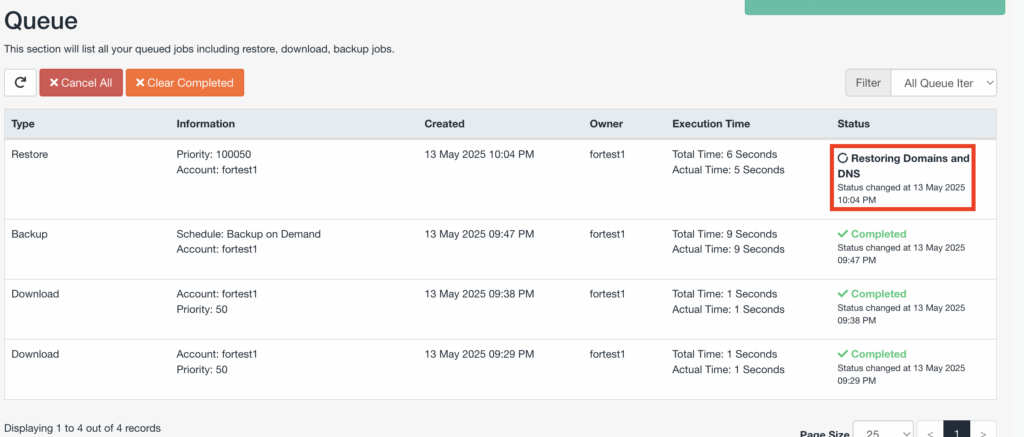
3. After that, you’ll be redirected to the Queue page. Once the restore is complete, the status will update to “Completed” along with the timestamp showing when the restore finished.
Using this method, you’ve successfully created a cPanel DNS backup via JetBackup 5 that can be restored anytime.
Final tips
- Network Dynamics runs nightly backups, but it’s a good idea to create a manual DNS backup before editing any records.
- If the DNS zone option isn’t visible in JetBackup, reach out to our support team and we’ll assist you right away.
- A cPanel DNS backup with JetBackup 5 adds a layer of protection against configuration errors and helps keep your online services running smoothly.
Need support?
If you need help with your DNS backups or restoring records using JetBackup, the Network Dynamics support team is here to help. Reach out anytime, we’ll make sure your DNS and hosting environment stay secure and reliable.