
This topic covers processes requiring access to your Network Dynamics Client Area. If you’re not sure how to access the Client Area, please follow this guide before continuing – How do I Login to my Network Dynamics Hosting Client Area?
What are nameservers (NS)? #
The Domain Name System (DNS) uses special records to direct web and email traffic to the correct destination. Your DNS records tell the internet where to find your website and where to deliver mail for your domain.
Name Servers, or “NS” for short, are where DNS records are stored and managed. You need to specify in your domain configuration which nameservers your domain is using so the rest of the internet knows where to look for the right information.
If you have a hosting package or DNS management service with us, you’ll typically use Network Dynamics’ own nameservers.
However, in some cases, you may want to use external name servers and manage DNS records. In this case, you can manually set them using the steps outlined below.
Note: By default, domains registered with us use our name server settings.
Our default nameserver addresses #
The Network Dynamics nameserver addresses are:
- ns1.dnsrecord.com.au
- ns2.dnsrecord.com.au
To change NS or reset to the default #
1. First, login to the Network Dynamics Hosting Client Area
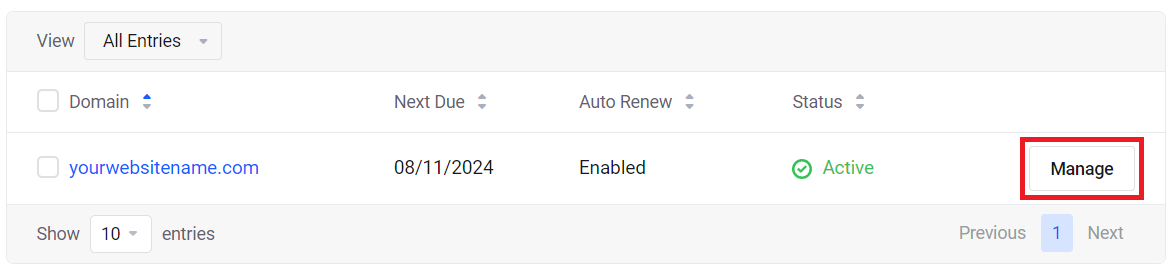
2. In your Client Area dashboard, click the ‘Domains’ button.

3. Find your domain in the list, then click the ‘Manage‘ button.
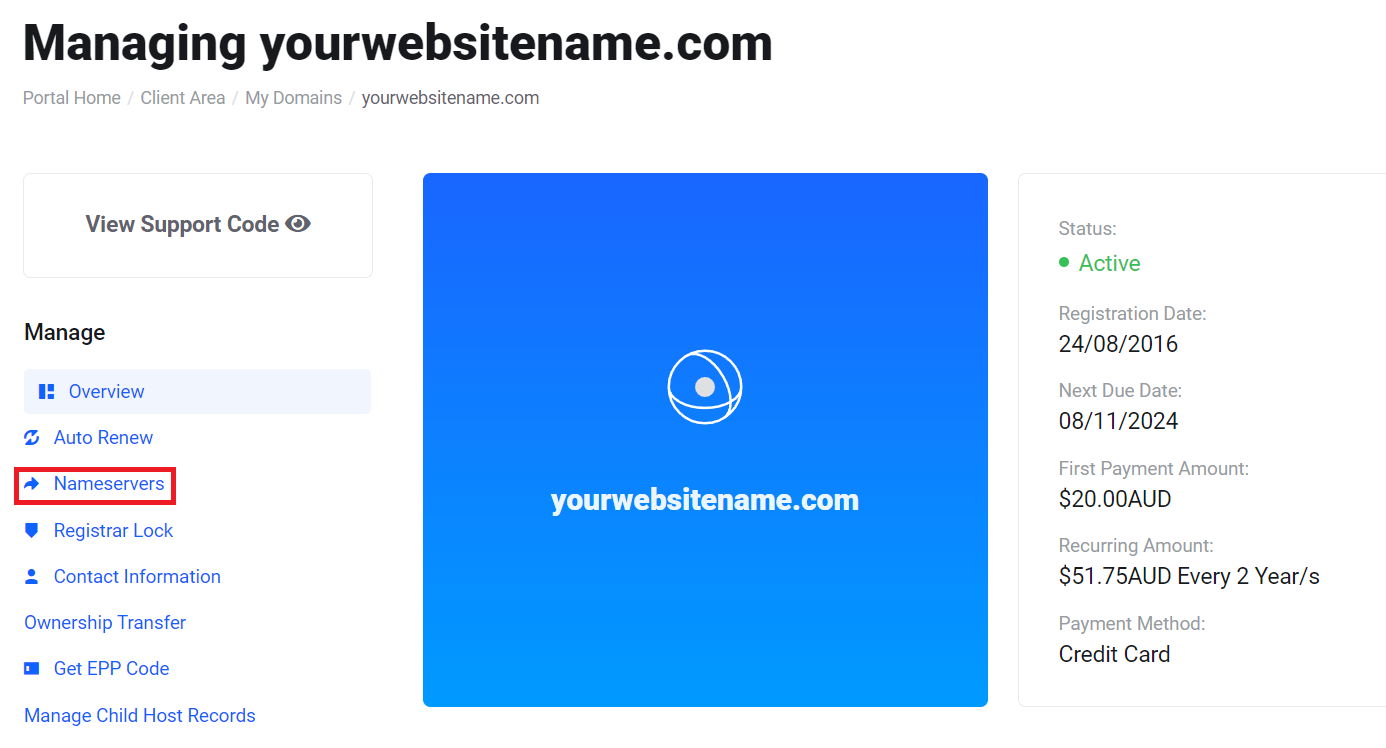
4. Click ‘Nameservers‘ from the list of actions on the left.
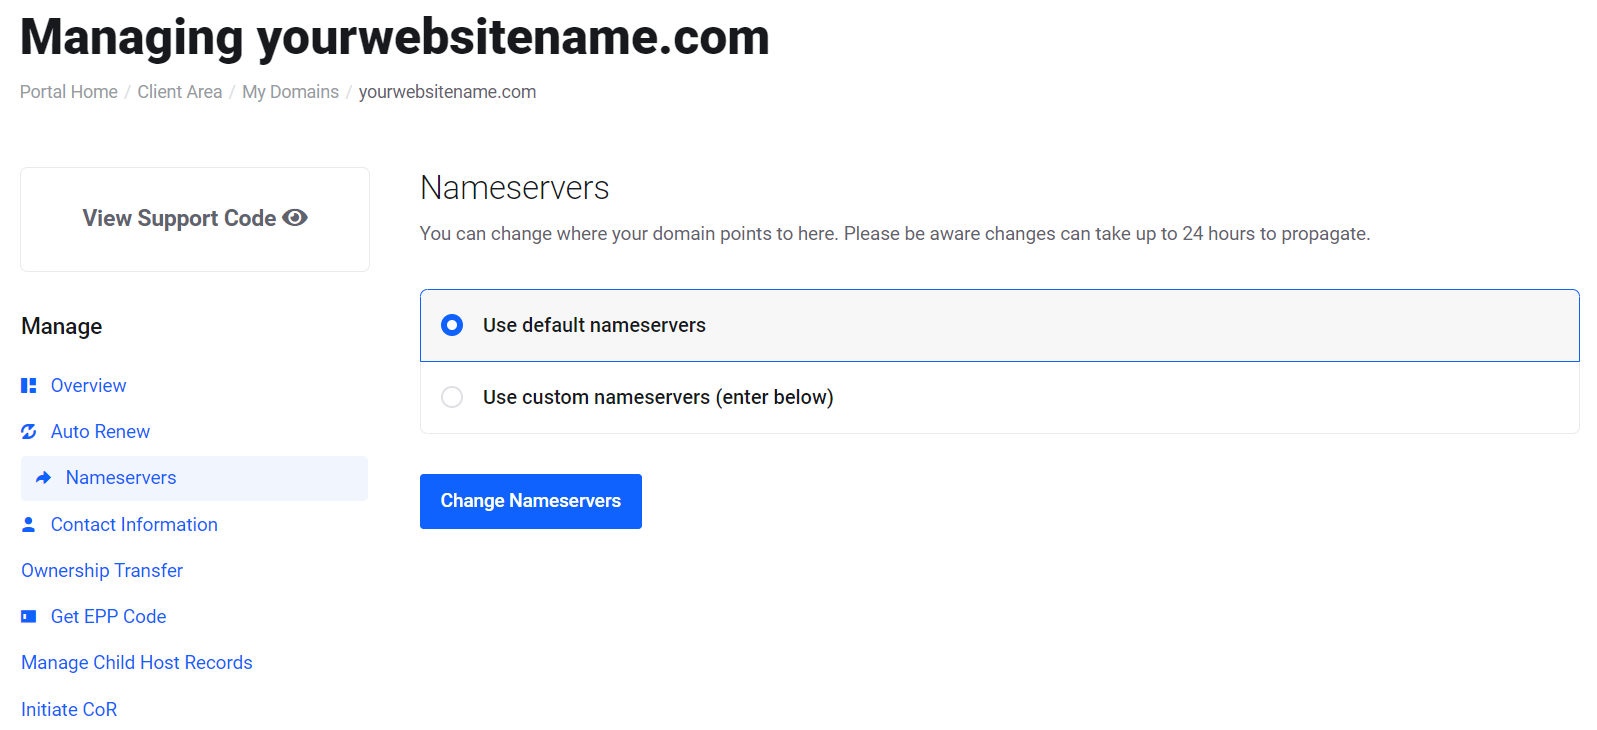
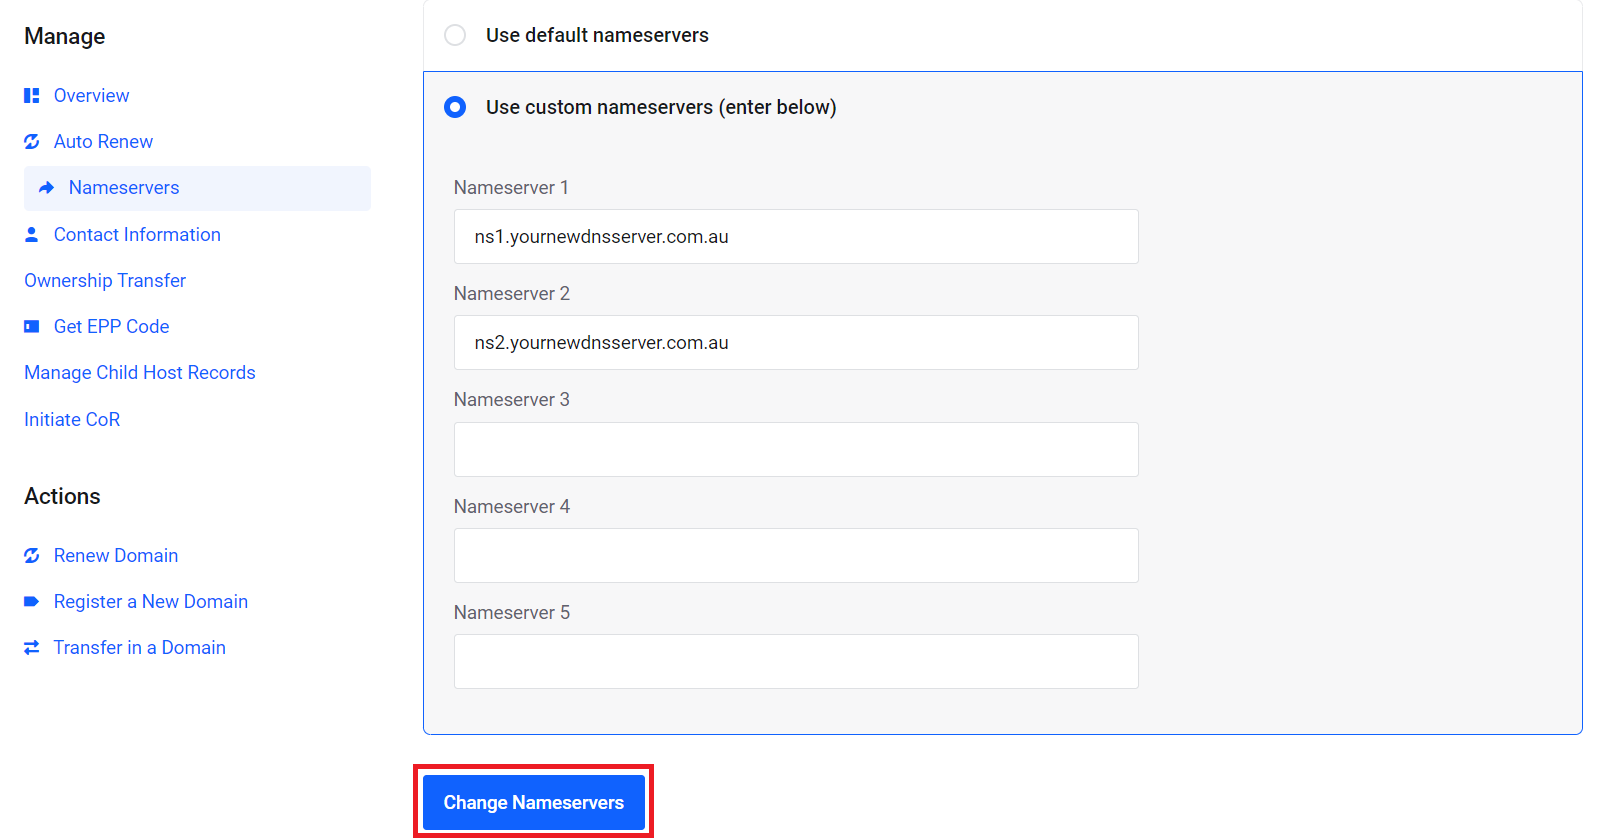
5. From here, you can either use Network Dynamics‘ default name servers by clicking ‘Use default nameservers’ or choose custom name servers if your DNS records are managed elsewhere.
6. To use custom name servers, click the ‘Use custom nameservers‘ option. Enter your custom name server addresses here (some providers may have multiple nameserver records (e.g. ns1. ns2. ns3.), make sure to enter them all).
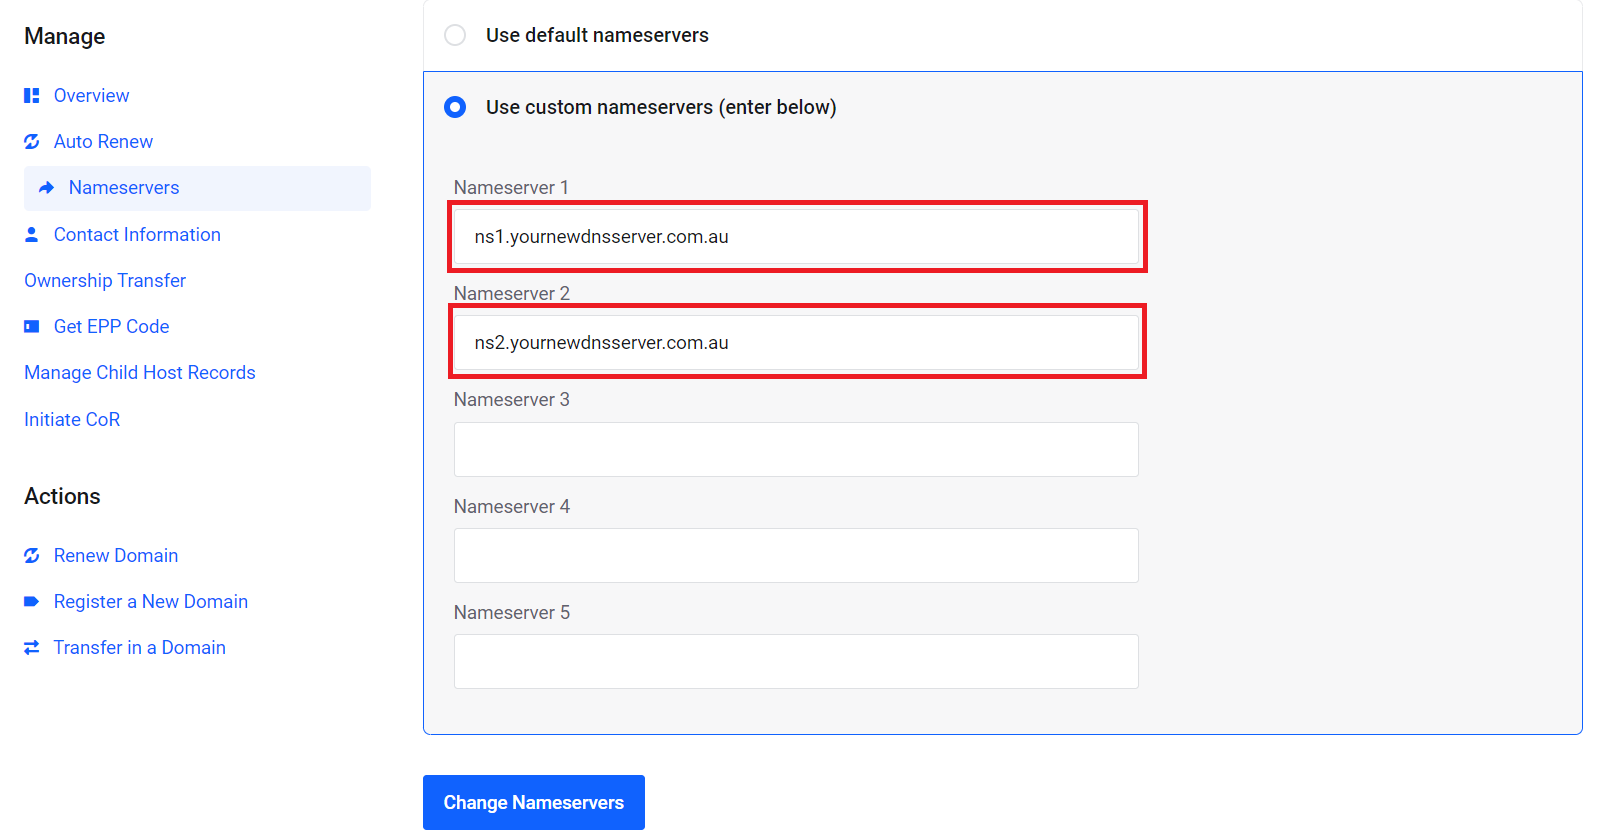
7. Then, click ‘Change Nameservers’ to apply the changes.
8. Now that you have updated the name servers, the location specified by the custom name server addresses in Step 6 now hosts and manages your domain’s DNS records.
NOTE: Name server changes may take up to 48 hours to update, and your services may experience mixed results during this period.
Conclusion #
Updating your nameservers ensures proper management of your domain’s DNS records. Always verify the changes to prevent service disruptions.