Set up WordPress SMTP for sending emails
This topic covers processes relating to a cPanel service.
You will need to be logged into the cPanel account to follow the steps. If you're not sure how to access your cPanel service - please, follow this guide before continuing: How do I login to cPanel?
Using 'SMTP' plugins in WordPress
By default, WordPress uses the "PHP mail()" function to send emails. However, due to increasing concerns about spam and email deliverability, this method is no longer considered best practice. Configuring WordPress SMTP (Simple Mail Transfer Protocol) ensures proper authentication and improves the likelihood that your emails reach their intended recipients.
As a result, email providers have begun to implement rules based on how the email was sent and often mail sent via 'PHPMail' can be classified as junk and filtered accordingly once it reaches the destination.
To reduce spam and follow security best practices, on our hosting services, all SMTP requests need to authenticate on the local server.
To do this, we recommend configuring an SMTP service for WordPress to use, and by doing so, all mail sent by the website will use this mechanism (authenticate on the local server) instead. Finally, as a bonus, you have more control over how email is delivered, and the setup is very easy.
In this example, we'll be using WP Mail SMTP. Feel free to use the SMTP plugin of your choice; however, in our experience, the WP Mail SMTP plugin remains reliable and performs well.
Important note when using external mail providers
If your domain is using an external mail provider, such as Google Workspace or Microsoft 365, be sure that your mail routing options are set correctly within your hosting service. Please see this guide for more information: How to set email routing options
PLEASE NOTE:
- This is a two-part process that requires you to first create an email address in your cPanel/hosting service.
- If you already have a cPanel email address set up, feel free to skip to Part 2, "Installing and Configuring WP Mail SMTP".
- Please also be sure to check that your domain has an SPF record containing Network Dynamics's SPF details - " include:_spf.wphosting.com.au ". Please see our guide, 'Adding an SPF record to your DNS Zone', for more information.
Part 1: Creating an Email Address in cPanel
To configure your site to send mail via SMTP, you'll need an email address set up within your hosting/cPanel account.
Note: The email account that you create in cPanel does not need to receive mail and there is no requirement for mail to be serviced by cPanel either. The account is only used for authentication – adjust your ‘From Email’ in WP SMTP Mail to an address that you can receive email to.
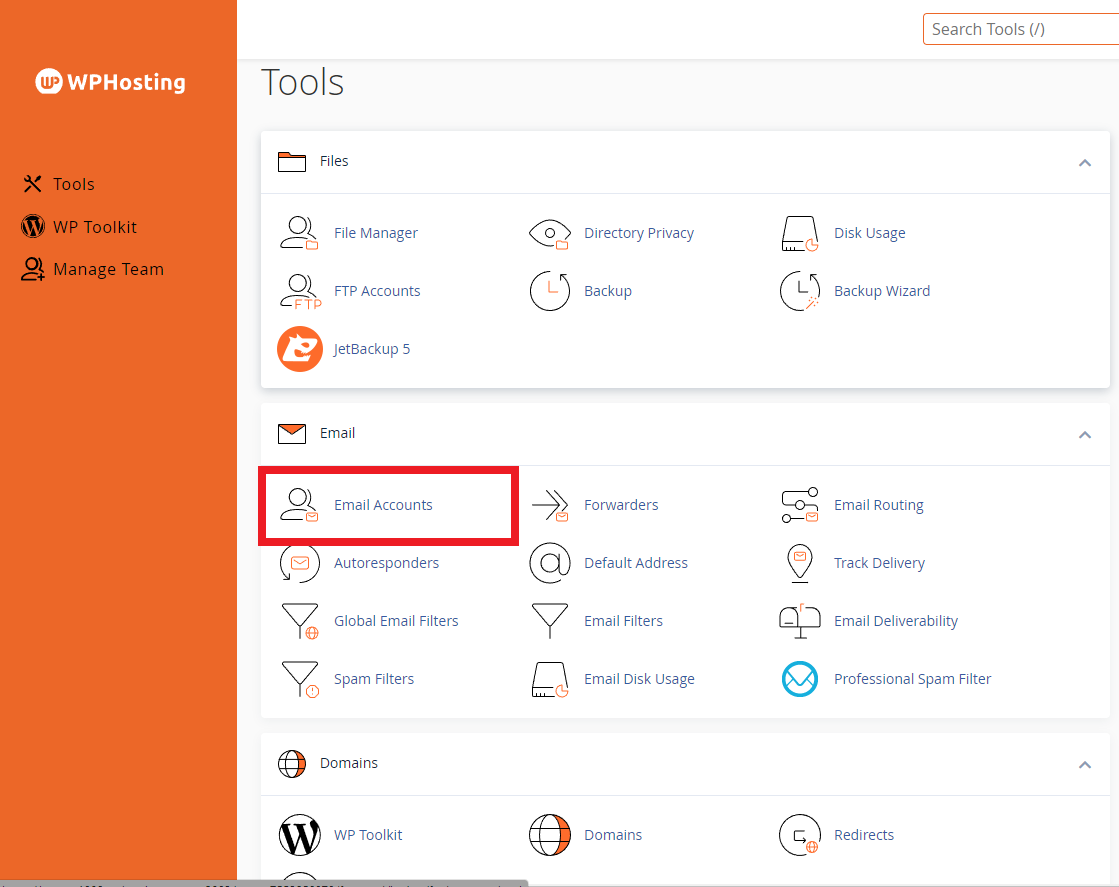
1. First, login to cPanel
2. Then, find and click on the 'Email Accounts' tool
3. After that, click the '+ Create' button
4. Then, Fill in the details of the new address
i.e. username, password and optional settings, if required
5. Click the '+ Create' button at the bottom when you're ready
6. Make sure to note the full address and password for later use.
For more detailed instructions on creating email addresses in cPanel, please see the following guide: How to Create Email Accounts in cPanel.
Part 2: Installing and Configuring WP SMTP Mail
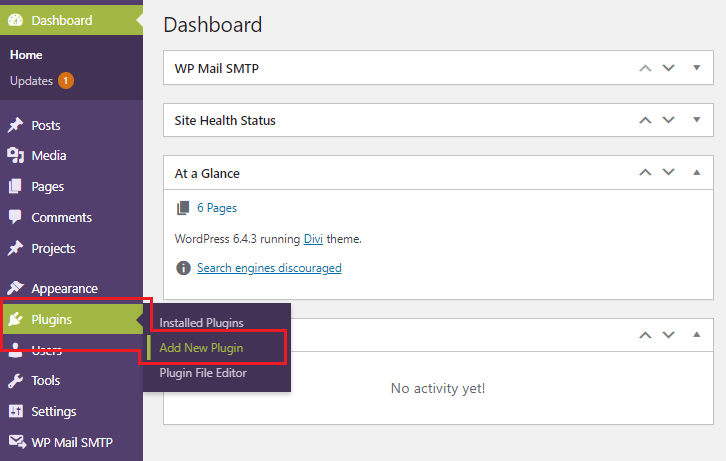
Now that you have an email address created in cPanel, you can move on to the WordPress admin area of your website.
7. Login to your website's admin area
(default login URL: yourdomain.com/wp-admin)
8. From the left side menu, navigate to Plugins >> Add New Plugin
9. Then, in the 'Search plugins...' box, type 'WP Mail SMTP'
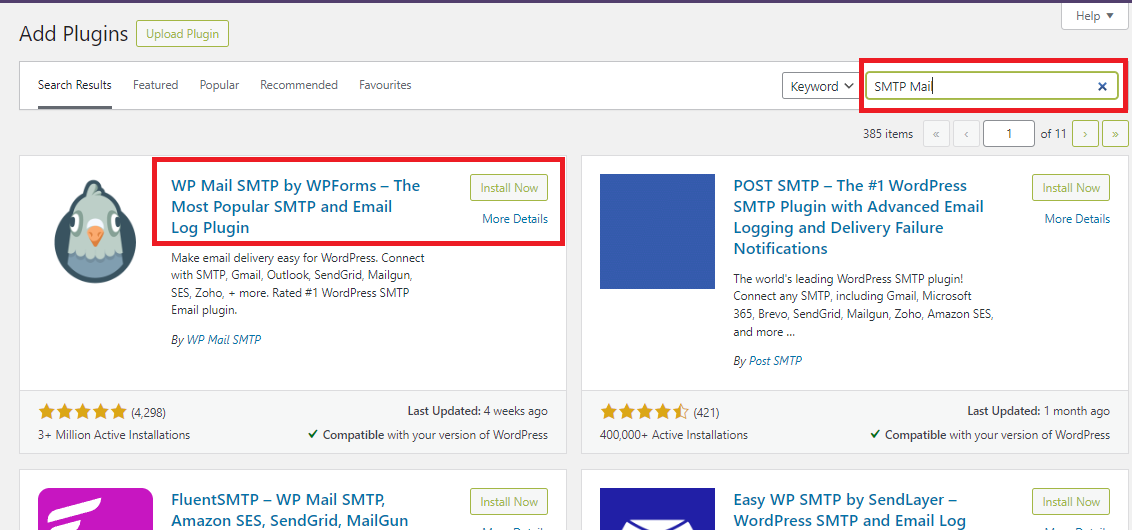
10. The first result will be 'WP Mail SMTP by WPForms', click 'Install Now'
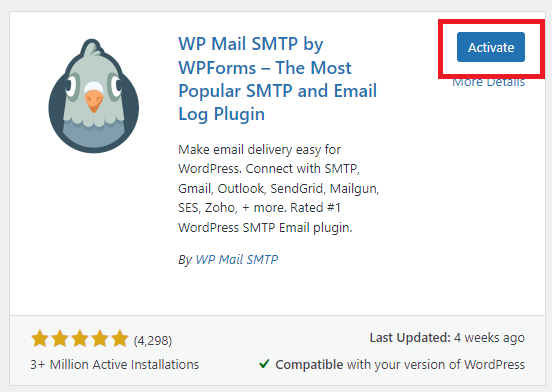
11. Once installed, click the 'Activate' button
12. Then, from the side menu, navigate to WP Mail SMTP >> Settings

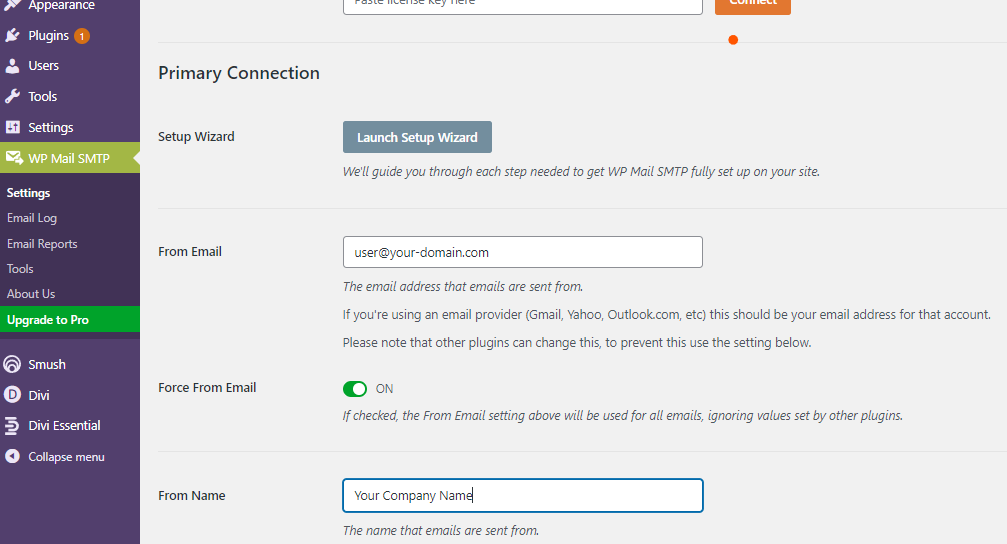
13. After that, set the 'From Email' and 'From Name' to your desired address and name
14. Then, scroll down to the 'Mailer' options, and you'll see a list of popular mail providers
15. After that, select the 'Other SMTP' option.

16. Next, you'll need to fill in the SMTP information using the details below and the email credentials we noted earlier in the guide.
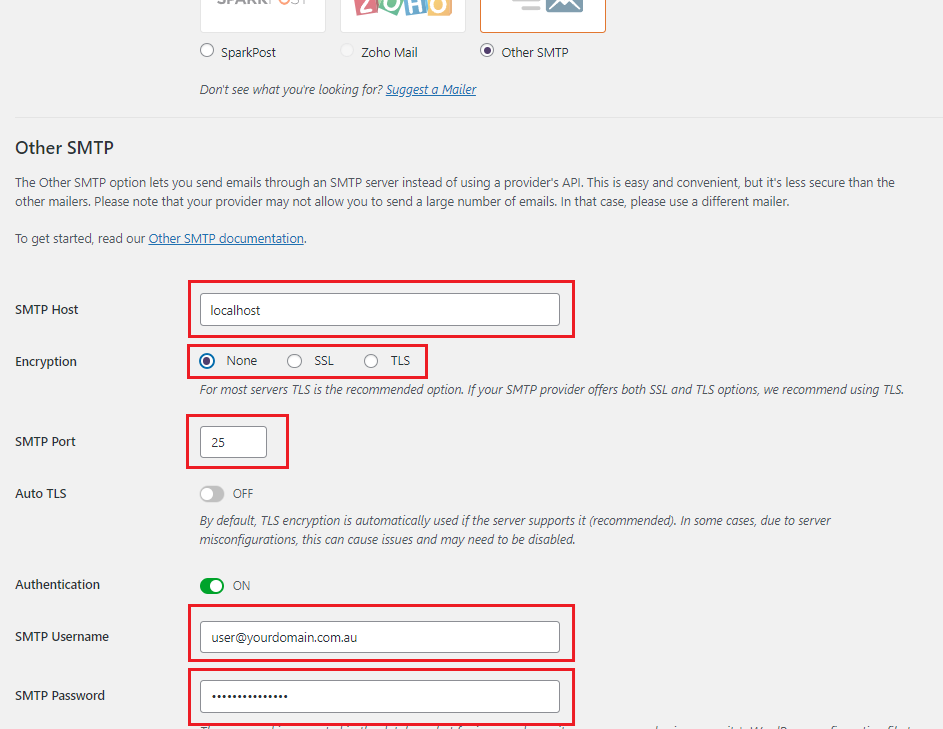
SMTP settings
- SMTP Host: localhost
- Encryption: none
- SMTP Port: 25
- Authentication: ON
- SMTP Username: your full email address
- SMTP Password: password for this email account
17. Then, scroll to the bottom and click 'Save Settings'
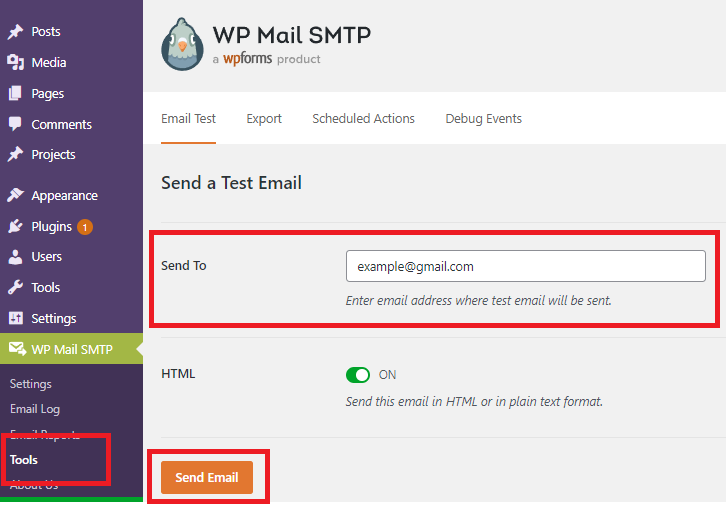
18. To send a test email, click 'Tools' from WP Mail SMTP's options in the left side menu
19. Next, fill in the recipient's email address and click 'Send Email'
20. Finally, that's it! You're done.
Your site should now be configured to use the email address you created to send mail from the hosting service.
PLEASE NOTE: Make sure to check that your domain has an SPF record containing Network Dynamics's SPF details - " include:_spf.wphosting.com.au ". Please see our guide, 'Adding an SPF record to your DNS Zone', for more information.
You can choose to use a different SMTP plugin if you prefer. However, based on our experience, the WP Mail SMTP plugin remains reliable and performs well.
The same settings will work in other plugins as well; simply adjust your application according to your specific needs.
Ensuring reliable email delivery is crucial for maintaining effective communication through your WordPress site. Configuring WordPress SMTP using the WP Mail SMTP plugin enhances email authentication. This reduces the chances of your messages being marked as spam or going undelivered. Implementing this setup not only improves deliverability but also strengthens your site's credibility and user engagement.